
Oh my goodness, let me tell you about the first time I stumbled upon Tiramisu Truffles – pure bliss in bite-sized form! I was hosting a last-minute dinner party (because of course I waited until the day before) when I realized I’d forgotten dessert. Panic! Then I remembered this genius no-bake idea combining all my favorite tiramisu flavors – creamy mascarpone, bold coffee, and that heavenly cocoa dusting. The best part? They come together faster than you can say “second helping” and taste like you spent hours in the kitchen. These little coffee-chocolate gems will make you look like a pastry pro with minimal effort.
Why You’ll Love These Tiramisu Truffles
Trust me, these little bites of joy are about to become your new go-to dessert. Here’s why:
- No baking required – Just mix, chill, and roll! Perfect for when your oven’s busy (or when you’re just feeling lazy).
- Explosion of flavors – Coffee, creamy mascarpone, and chocolate all in one perfect bite.
- Impressively easy – They look fancy but couldn’t be simpler to make.
- Party perfect – Bite-sized means no plates or forks needed (more time for eating!).
Once you try them, you’ll understand why I make these at least twice a month!
Ingredients for Tiramisu Truffles
Gathering these simple ingredients is half the fun – I love how they all come together to create magic! Here’s what you’ll need to make about 20 heavenly truffles:
- 1 cup mascarpone cheese – Pull it out of the fridge about 15 minutes early so it softens nicely. That rich, creamy texture is everything!
- 1/2 cup heavy cream – The secret to that luscious mouthfeel. Cold is best for whipping, but we’re just mixing here.
- 1/4 cup strong brewed coffee, cooled – I use espresso when I’m feeling fancy, but your morning brew works great too. Just make sure it’s room temp!
- 2 tbsp granulated sugar – Not too sweet, just enough to balance the coffee’s bitterness.
- 1 tsp vanilla extract – The good stuff, please! It makes all the difference.
- 1 1/2 cups crushed ladyfinger cookies – About 12-15 cookies crushed fine. I put them in a bag and whack them with a rolling pin – great stress relief!
- 1/4 cup cocoa powder – For that classic tiramisu dusting. Dutch-processed gives the richest color.
- 1/4 cup dark chocolate, grated – Optional, but oh so good for coating. I use a microplane for super-fine shreds.
See? Nothing weird or hard to find – just simple ingredients that create something extraordinary. Now let’s get mixing!
Equipment You’ll Need
No fancy gadgets required here! Just grab these basics from your kitchen:
- Medium mixing bowl (I love my trusty glass one)
- Whisk or sturdy spoon
- Baking sheet lined with parchment
- Small scoop or tablespoon (for perfect portions)
That’s it – now you’re ready to make truffle magic!
How to Make Tiramisu Truffles
Alright, let’s roll up our sleeves and make some truffle magic happen! Don’t let the fancy name fool you – this is one of those recipes where the results look way more impressive than the effort required. Just follow these simple steps, and you’ll be snacking on coffee-kissed bites of heaven in no time!
Step 1: Prepare the Tiramisu Mixture
First things first – that dreamy, creamy base! In your mixing bowl, combine the mascarpone, heavy cream, cooled coffee, sugar, and vanilla. Now, here’s my secret: don’t whip it like crazy – just mix until everything is smooth and well blended. You’re looking for a texture somewhere between cake batter and pudding – thick enough to hold its shape but soft enough to scoop easily. If it seems too runny, don’t panic! The cookies we’re adding next will soak up any extra moisture.
Step 2: Fold in Ladyfinger Crumbs
Time to add some structure! Pour in those crushed ladyfinger crumbs and grab your spatula. The key here is gentle folding – think of it like tucking a baby into bed rather than mixing concrete. Go slow, scraping from the bottom and turning the mixture over itself until no dry spots remain. The mixture should hold together when you press it between your fingers – if it’s still sticky, you can add another tablespoon or two of crumbs. Remember, we want these truffles to hold their shape but still melt in your mouth!
Step 3: Chill and Shape the Truffles
Here’s where patience pays off! Pop that bowl in the fridge for a solid hour – I know, waiting is hard when you’re craving dessert, but trust me, it makes all the difference. You’ll know it’s ready when you can scoop it without the mixture sticking to your fingers. I use a small cookie scoop (about 1 tablespoon) for perfect portions, but a regular spoon works too. Roll quickly between your palms – if things get sticky, lightly damp hands help. Pro tip: keep a bowl of cold water nearby to rinse your hands between batches!

Step 4: Coat and Finish the Tiramisu Truffles
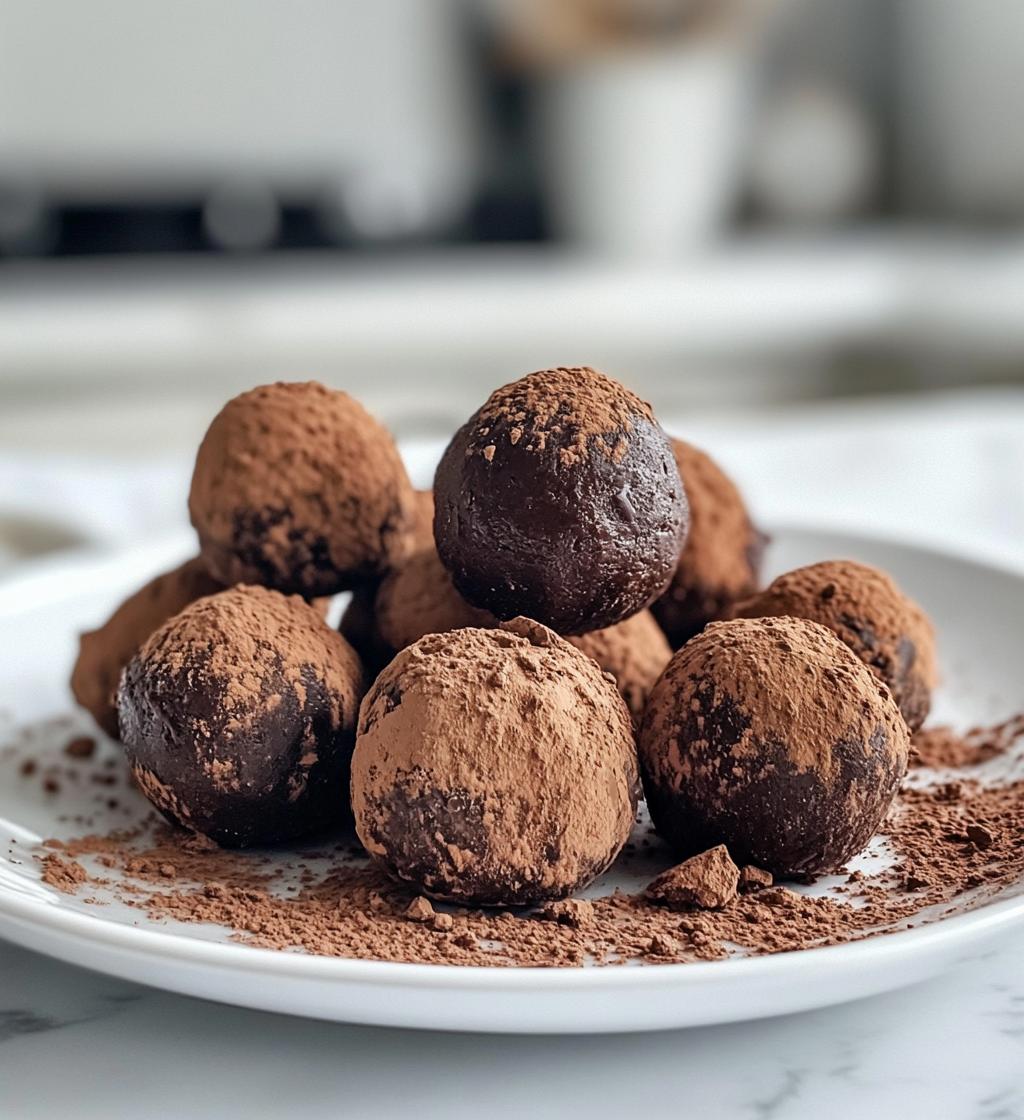
The fun part – making them pretty! For the classic look, roll them in cocoa powder until fully coated. Want something fancier? Try the grated dark chocolate – it gives an amazing texture contrast. My trick? Put your coating in a shallow bowl, drop in a few truffles at a time, then gently shake the bowl like you’re panning for gold. They come out perfectly coated with minimal mess! Pop them back in the fridge for 30 minutes to set, then prepare for compliments when you serve these beauties.

Tips for Perfect Tiramisu Truffles
Want to take your Tiramisu Truffles from good to absolutely irresistible? Here are my tried-and-true tips that I’ve picked up after making these more times than I can count:
- Use cold coffee – Trust me, room temp or warm coffee can make the mixture too soft. Cold coffee keeps everything firm and helps the flavors really shine.
- Freeze briefly for easier shaping – If the mixture feels sticky even after chilling, pop it in the freezer for 15-20 minutes. It’ll firm up just enough to make rolling a breeze.
- Damp hands are your friend – Lightly wet your hands before rolling the truffles. It prevents sticking and gives you smooth, perfect balls every time.
- Double coat for extra decadence – For a richer chocolate flavor, roll the truffles in cocoa powder first, then dip them in melted dark chocolate. It’s a game-changer!
These little tricks make all the difference. Now go wow your friends and family with the best Tiramisu Truffles they’ve ever had!
Variations to Try
One of the best things about these Tiramisu Truffles? They’re like a blank canvas for your dessert creativity! Here are some of my favorite twists that I’ve tried (and loved) over the years:
- Espresso boost – Swap the brewed coffee for 1 tablespoon of espresso powder mixed with 3 tablespoons of hot water. It gives an extra coffee punch that serious java lovers adore.
- White chocolate dream – Instead of cocoa powder, try rolling the truffles in finely grated white chocolate. The sweetness balances the coffee flavor beautifully.
- Nutty delight – Mix in 1/4 cup of finely chopped toasted hazelnuts or almonds with the ladyfinger crumbs. The crunch is amazing!
- Boozy version – For adult gatherings, replace 1 tablespoon of the coffee with Kahlua or amaretto. Just don’t tell the kids!
- Gluten-free option – Use gluten-free ladyfingers or vanilla wafers. I’ve done this for friends with dietary needs, and nobody could tell the difference.
Honestly, half the fun is experimenting with flavors! Last Christmas I even tried dipping some in crushed peppermint – surprisingly delicious. What variations will you dream up?
Serving and Storing Tiramisu Truffles
Now for the best part – enjoying your Tiramisu Truffles! These little beauties taste best when they’re nicely chilled, so I always keep them in the fridge until just before serving. The cold temperature makes that creamy center extra luscious against the crisp cocoa or chocolate coating. For parties, I arrange them on a pretty platter with some extra cocoa dusted on top – looks super fancy but took next to no effort!
If you’re planning ahead (unlike me most of the time), these truffles store beautifully in an airtight container in the fridge for up to 3 days. Just layer them between sheets of parchment paper so they don’t stick together. Pro tip: wait to coat them in cocoa or chocolate until right before serving if you can – it keeps the coating from getting damp.
Want to make them even further ahead? You can freeze the shaped but uncoated truffle balls for up to a month! Thaw overnight in the fridge, then roll in your coating of choice when you’re ready to serve. I’ve done this for last-minute hostess gifts more times than I can count – total lifesaver!
One last serving idea – for a really special presentation, serve them in mini paper cups like you get at bakeries. It keeps fingers clean and makes them look professionally made. My kids love when I do this for their school events – they always come home with empty containers and happy friends!
Tiramisu Truffles Nutrition Info
Now, let’s talk nutrition – but remember, we’re here for the joy of eating first! These numbers are estimates based on my standard recipe, but your exact counts might vary depending on specific ingredients. Each delightful truffle (about 1-inch diameter) contains roughly:
- Calories: 85
- Fat: 6g (3.5g saturated)
- Carbohydrates: 7g
- Sugar: 4g
- Protein: 1g
- Sodium: 15mg
A few things to note: The mascarpone and heavy cream bring that rich, creamy texture but also most of the fat content. The sugar comes mainly from the cookies and the small amount we add – not too bad for a dessert, right? And that little protein boost from the cheese helps balance things out.
If you’re watching certain nutrients, you can tweak the recipe – try reduced-fat mascarpone (though the texture changes a bit) or less sugar in the mixture. But honestly? Life’s too short not to enjoy the real deal sometimes – especially when we’re talking about treats as special as these!
FAQs About Tiramisu Truffles
Over the years, I’ve gotten so many questions about these little coffee-chocolate wonders! Here are the answers to the ones that pop up most often:
Can I freeze Tiramisu Truffles?
Absolutely! Freeze the shaped but uncoated balls on a parchment-lined tray first (about 2 hours), then transfer to an airtight container for up to a month. When ready to serve, thaw overnight in the fridge and roll in your coating. The texture stays perfect – I do this all the time for last-minute guests!
How can I make these gluten-free?
Easy peasy – just swap the ladyfingers for gluten-free vanilla wafers or almond flour cookies. Crush them the same way, and nobody will know the difference. I made these for my gluten-sensitive neighbor last Christmas, and she swore they were better than the original!
Why did my truffle mixture turn out too soft?
Oh, I’ve been there! Usually it’s one of three things: your coffee was too warm when added, the mascarpone wasn’t cold enough, or you didn’t chill long enough before rolling. The fix? Pop the bowl in the freezer for 20 minutes – it’ll firm right up. Next time, make sure everything’s properly chilled before mixing.
Can I use something besides coffee?
Of course! For a caffeine-free version, try chai tea or hot chocolate mix dissolved in water. My niece loves when I make them with orange juice and zest instead – gives a lovely citrus twist. Just keep the liquid amount the same as the coffee called for in the recipe.
How far in advance can I make these?
The truffle balls (uncoated) keep beautifully in the fridge for 3 days. For best results, add the cocoa or chocolate coating no more than a few hours before serving to prevent moisture issues. They’re actually better after a day as the flavors meld – if they last that long in your house!
Print
Heavenly Tiramisu Truffles: 45-Minute No-Bake Bliss
- Total Time: 1 hr 45 mins (including chilling)
- Yield: 20 truffles 1x
- Diet: Vegetarian
Description
Tiramisu Truffles are a delightful bite-sized dessert inspired by the classic Italian tiramisu. These truffles combine the rich flavors of coffee, cocoa, and creamy mascarpone for a perfect sweet treat.
Ingredients
- 1 cup mascarpone cheese
- 1/2 cup heavy cream
- 1/4 cup strong brewed coffee, cooled
- 2 tbsp granulated sugar
- 1 tsp vanilla extract
- 1 1/2 cups crushed ladyfinger cookies
- 1/4 cup cocoa powder
- 1/4 cup dark chocolate, grated
Instructions
- In a bowl, mix mascarpone, heavy cream, coffee, sugar, and vanilla until smooth.
- Fold in crushed ladyfinger cookies until well combined.
- Chill the mixture in the fridge for 1 hour until firm.
- Roll the mixture into small balls, about 1 inch in diameter.
- Coat each truffle in cocoa powder or grated dark chocolate.
- Chill for another 30 minutes before serving.
Notes
- Use cold coffee for a stronger flavor.
- For a firmer texture, freeze the mixture for 20 minutes before rolling.
- Store in an airtight container in the fridge for up to 3 days.
- Prep Time: 15 mins
- Cook Time: 0 mins
- Category: Dessert
- Method: No-Bake
- Cuisine: Italian
Nutrition
- Serving Size: 1 truffle
- Calories: 85
- Sugar: 4g
- Sodium: 15mg
- Fat: 6g
- Saturated Fat: 3.5g
- Unsaturated Fat: 2g
- Trans Fat: 0g
- Carbohydrates: 7g
- Fiber: 0.5g
- Protein: 1g
- Cholesterol: 15mg
Keywords: Tiramisu Truffles, Dessert, No-Bake, Italian, Sweet Treat


