
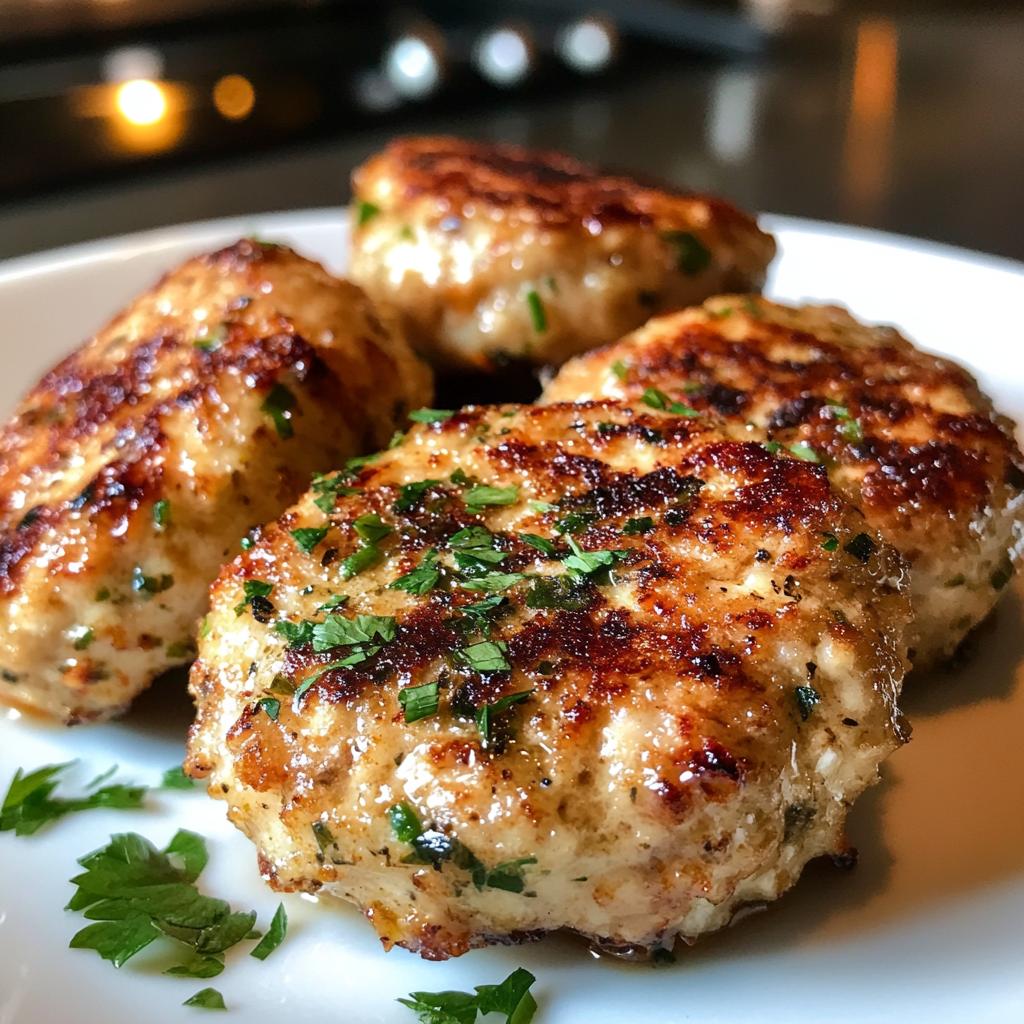
Oh, you’re going to love these chicken rissoles! They’re my go-to when I need something quick, tasty, and crowd-pleasing—whether it’s a busy weeknight dinner or last-minute party appetizers. The secret? Using good-quality minced chicken (none of that watery, pre-packaged stuff!) and fresh herbs that really make the flavors pop. I’ve made these patties more times than I can count, tweaking the recipe until they’re just right—juicy on the inside, golden and crisp on the outside. They’re so versatile too—serve them as-is, pop them in a bun, or even pack them cold for picnics. Trust me, once you try this recipe, you’ll keep coming back to it!
Why You’ll Love These Chicken Rissoles
Let me tell you, these chicken rissoles are a game-changer. Here’s why they’re my absolute favorite:
- Quick and easy: From prep to plate in under 30 minutes—perfect for those “what’s for dinner?” moments.
- Flavor-packed: Fresh herbs, garlic, and a hint of onion make every bite taste like you’ve spent hours in the kitchen.
- Versatile: Serve them as appetizers, main dishes, or even sandwich fillers. They work for every occasion!
- Meal-prep friendly: Make a big batch and stash them in the fridge or freezer for easy meals all week.
- Healthy option: Made with lean minced chicken, they’re a lighter alternative to beef patties but still super satisfying.
Honestly, these rissoles are such a lifesaver—flavorful, fuss-free, and always a hit. You’ll wonder how you ever lived without them!
Ingredients for Chicken Rissoles
Alright, let’s gather everything you’ll need for these juicy chicken rissoles. I’m a stickler for fresh ingredients—it really makes all the difference in flavor and texture. Here’s what you’ll want to have ready:
- 500g minced chicken: Go for thigh meat if you can—it’s juicier than breast meat. But breast works fine too if that’s what you’ve got!
- 1 small onion, finely chopped: About the size of a tennis ball. Yellow or white onions both work beautifully here.
- 1 egg: Just your standard large egg to bind everything together.
- 1/2 cup breadcrumbs: I prefer fresh breadcrumbs—they give the best texture. But store-bought dry ones work in a pinch.
- 2 cloves garlic, minced: Fresh is best! None of that jarred stuff if you can help it.
- 1 tbsp fresh parsley, chopped: Flat-leaf parsley gives the nicest flavor, but curly works too.
- 1 tsp salt: I use sea salt, but regular table salt is fine.
- 1/2 tsp black pepper: Freshly ground makes all the difference!
- 1 tbsp olive oil: For frying—any neutral oil works if you don’t have olive oil.
Ingredient Notes & Substitutions
Now, I know sometimes you don’t have exactly what a recipe calls for—been there! Here are my tried-and-true swaps:
- Fresh herbs: No fresh parsley? Use 1 tsp dried parsley instead. Same goes for other herbs—fresh to dried ratio is about 3:1.
- Breadcrumbs: Out of breadcrumbs? Crush some crackers or cornflakes—they work surprisingly well! For gluten-free, almond flour or gluten-free breadcrumbs are great.
- Onion: Don’t have fresh onions? 1 tsp onion powder can substitute in a pinch.
- Garlic: If you must use jarred, use 1/2 tsp per clove.
- Egg-free: You can skip the egg and add a bit more breadcrumbs if needed—the patties might be a bit more delicate though.
The beauty of these rissoles is they’re pretty forgiving—just don’t skimp on the chicken quality and you’ll be golden!
Equipment Needed for Chicken Rissoles
You don’t need fancy gadgets to make perfect chicken rissoles—just a few basic kitchen tools you probably already have. I’ve made these with next to nothing when cooking at my cousin’s tiny apartment, so trust me, they’re doable anywhere!
- Mixing bowl: Medium-sized is perfect. I like using glass or stainless steel—plastic can hold odors from the garlic and onions.
- Skillet or frying pan: My trusty cast-iron works wonders for that gorgeous golden crust, but any heavy-bottomed pan will do.
- Spatula: A thin, flexible one makes flipping these babies a breeze without breaking them.
- Chopping board & knife: For prepping the onions and herbs—nothing fancy required!
Nice-to-haves (but not essential!):
- Food processor: If you’re lazy like me some days, this chops onions and garlic in seconds. Just pulse—don’t turn them to mush!
- Cookie scoop: For perfectly even-sized patties every time. Though I usually just use my hands—the rustic look is charming!
- Meat thermometer: If you’re nervous about doneness, it should read 75°C (165°F) in the center. But honestly, after making these a few times, you’ll just know.
See? Nothing special needed. The beauty of chicken rissoles is their simplicity—good food doesn’t require a chef’s kitchen!
How to Make Chicken Rissoles
Alright, let’s get cooking! Making chicken rissoles is seriously simple—I’ve taught my 10-year-old niece to make these (with supervision, of course). Follow these steps, and you’ll have perfect patties every single time.
Step 1: Prepare the Mixture
First things first—dump all your ingredients into a big mixing bowl. I mean everything: minced chicken, chopped onion, egg, breadcrumbs, garlic, parsley, salt and pepper. Now here’s the important part—use your hands to mix it all together! A spoon just doesn’t cut it.
Get in there and squish everything between your fingers until it’s completely combined. You’ll know it’s ready when you can’t see any streaks of egg or pockets of breadcrumbs. But careful—don’t overmix or the rissoles might get tough. About 1-2 minutes of mixing is perfect.
Pro tip: If you’ve got time, cover the bowl and pop it in the fridge for 30 minutes. The flavors meld together beautifully, and the mixture firms up, making shaping way easier.
Step 2: Shape the Patties
Okay, here’s where things get fun! Scoop up about 1/4 cup of the mixture—roughly the size of a golf ball. Now, here’s my secret weapon: wet your hands first. Sounds simple, but it stops the mixture from sticking to your fingers like glue.
Gently shape into patties about 1cm thick. Don’t pack them too tight or they’ll be dense—just enough to hold together. I make mine about the size of my palm, but you do you! If they’re cracking at the edges, the mixture might need another quick mix or a splash of water.
Lay them on a plate as you go—you should get about 8 perfect little rissoles from this recipe. If you’re prepping ahead, you can stack them with baking paper between layers.
Step 3: Cook the Chicken Rissoles
Heat your oil in a pan over medium heat—not too hot, or they’ll burn before cooking through. Test the oil with a breadcrumb—if it sizzles gently, you’re good to go.
Carefully add the patties (don’t crowd the pan—cook in batches if needed). Now here’s the hard part: resist the urge to poke or press them! Let them cook undisturbed for 4-5 minutes until golden brown on the bottom. You’ll see the edges start to turn opaque—that’s your cue to flip.
Cook the other side for another 4-5 minutes until beautifully golden and cooked through. They should feel firm but springy when pressed. If you’re unsure, cut one open—no pink should remain, and juices should run clear.
Transfer to a plate lined with paper towel to absorb excess oil, then serve immediately while they’re hot and juicy. Oh my, just writing this is making me hungry!
Tips for Perfect Chicken Rissoles
Want to make the absolute best chicken rissoles? Here are my tried-and-true tips that’ll take your patties from good to *wow*:
- Chill the mixture: Pop it in the fridge for 30 minutes before shaping. It firms up, making the patties easier to handle and less likely to fall apart.
- Use fresh breadcrumbs: They’re softer and absorb moisture better, giving you juicier rissoles. Just blitz some stale bread in a food processor—easy!
- Wet your hands: When shaping the patties, keep a bowl of water nearby to wet your fingers. It stops the mixture from sticking like glue.
- Don’t overmix: Mix just until everything’s combined. Overworking the mixture can make the rissoles dense and tough.
- Medium heat is key: Cook them over medium heat—too hot, and they’ll burn on the outside before cooking through.
- Don’t press them: Resist the urge to flatten them with a spatula while cooking. You’ll squeeze out all that juicy goodness!
- Double the batch: These freeze beautifully. Make extra, freeze them uncooked, and you’ve got quick meals ready to go.
Follow these tips, and you’ll have chicken rissoles that are golden, juicy, and absolutely irresistible every time. Trust me, they’re foolproof!
Serving Suggestions for Chicken Rissoles
Now comes the best part—eating these beauties! Chicken rissoles are crazy versatile, and I’ve served them about a million different ways over the years. Here are my absolute favorite ways to enjoy them:
- As-is with dipping sauces: Perfect finger food for parties! Try them with:
- A simple garlic aioli (just mayo, garlic, lemon)
- Sweet chili sauce for a tangy kick
- Tzatziki or ranch dressing for cooling contrast
- In burger buns: My kids’ favorite—pile them high with lettuce, tomato, and a smear of mayo. So good!
- With salads: They pair amazingly with:
- A crisp Greek salad
- Simple greens with lemon vinaigrette
- Coleslaw for that perfect crunch
- With roasted veggies: Throw some sweet potato fries or roasted broccoli alongside—easy complete meal!
- As appetizers: Make them mini-sized (about tablespoon-sized) and serve with toothpicks.
- Breakfast twist: Leftovers? Fry an egg and pop it on top—breakfast of champions!
The possibilities are endless—that’s what I love about them! Whether you’re doing casual dinner, fancy appetizers, or meal prep lunches, these rissoles always hit the spot.
Storing and Reheating Chicken Rissoles
One of the best things about these chicken rissoles? They keep like a dream! I always make extra because they’re just as good (sometimes better) the next day. Here’s how I store and reheat them to keep that perfect texture:
Storing in the Fridge
Let the cooked rissoles cool completely first—I usually spread them out on a plate for about 20 minutes. Then pop them in an airtight container with a sheet of baking paper between layers if stacking. They’ll stay fresh for 3-4 days in the fridge.
For uncooked patties, arrange them on a tray lined with baking paper, cover tightly with plastic wrap, and refrigerate for up to 24 hours before cooking. Perfect for meal prep!
Freezing for Later
These freeze beautifully both cooked and uncooked—my freezer always has a stash! For uncooked rissoles:
- Place shaped patties on a baking sheet
- Freeze until solid (about 2 hours)
- Transfer to freezer bags or containers
- They’ll keep for 3 months
For cooked rissoles, let them cool completely first, then freeze the same way. They’ll last 2 months without losing quality.
Reheating Like a Pro
The microwave is tempting, but it makes them soggy—here’s how to keep that gorgeous crispness:
- Oven method: Preheat to 180°C (350°F). Place rissoles on a rack over a baking sheet and heat for 10-15 minutes until warmed through.
- Air fryer magic: My favorite! 160°C (320°F) for 5-7 minutes makes them taste freshly cooked.
- Skillet refresh: A quick fry in a dry pan over medium heat for 2-3 minutes per side revives them beautifully.
For frozen uncooked rissoles, no need to thaw—just cook from frozen, adding 2-3 extra minutes per side. Easy peasy!
See? With these tricks, you can enjoy perfect chicken rissoles anytime the craving hits. I love having a batch ready to go—it’s like having takeout in your freezer, but way better!
Chicken Rissoles Nutritional Information
Okay, let’s talk numbers—but don’t worry, these chicken rissoles are actually pretty light as far as patties go! Just remember, these values are estimates since ingredients can vary (especially if you tweak the recipe like I sometimes do). Here’s the scoop per rissole (based on making 8 from this recipe):
- Calories: About 120 per patty—not bad for something so satisfying!
- Protein: 12g (hello, muscle fuel!)
- Carbs: 6g (mostly from the breadcrumbs)
- Fat: 5g (and only 1g saturated—thank you, lean chicken!)
- Fiber: 0.5g (not huge, but pair with veggies for a fiber boost)
- Sugar: Just 1g (natural from the onions)
- Sodium: Around 300mg (easy to reduce if you’re watching salt—just cut back a smidge)
A few things to note: Using chicken breast instead of thigh will lower the fat content slightly. If you go heavy on the oil for frying, that’ll add a bit more fat (I often use cooking spray to cut this down). And if you’re gluten-free, using almond flour instead of breadcrumbs changes the macros—more protein and healthy fats!
The best part? These rissoles pack in protein without loading up on calories, making them perfect for everything from post-workout meals to kid-friendly lunches. Just don’t tell my kids they’re eating something healthy—they think they’re getting away with eating “chicken nuggets”!
FAQs About Chicken Rissoles
I get asked about these chicken rissoles ALL the time—here are the questions that pop up most often with my tried-and-true answers:
Can I bake these instead of frying them?
Absolutely! I do this often when making big batches. Just pop them on a lined baking tray at 200°C (400°F) for about 15-20 minutes, flipping halfway. They won’t get quite as golden but still taste delicious. Bonus: it’s hands-off cooking!
My rissoles keep falling apart—what am I doing wrong?
Oh, I’ve been there! Usually it’s one of three things:
- Not enough breadcrumbs (add another tablespoon)
- Mixture too wet (try chilling it first)
- Flipping too soon (wait until they’re properly browned on one side)
A little troubleshooting and you’ll have perfect patties in no time!
Can I use turkey instead of chicken?
You bet! Ground turkey works great—just know it’s leaner, so your rissoles might be a tad drier. I sometimes add an extra egg yolk or a spoon of yogurt to compensate. The flavor’s just as yummy though!
How do I know when they’re fully cooked?
They should be golden brown outside and reach 75°C (165°F) inside. No thermometer? Cut one open—no pink should remain, and juices should run clear. After making them a few times, you’ll just know by the firm-but-springy feel.
Can I make these gluten-free?
Of course! Swap regular breadcrumbs for gluten-free ones, almond flour, or crushed gluten-free crackers. The texture changes slightly but they’re still delicious. My celiac friend swears by the almond flour version!
Final Thoughts
There you have it—my absolute favorite way to make chicken rissoles that are juicy, flavorful, and ridiculously easy! I can’t tell you how many times this recipe has saved me when I needed something quick but didn’t want to sacrifice taste. Whether you’re serving them at a party, packing them for lunch, or just need a simple weeknight dinner, these little patties never disappoint.
What I love most is how adaptable they are—once you’ve got the basic recipe down, you can play around with different herbs, spices, or even add-ins like grated zucchini or cheese. My kids beg for the “cheesy surprise” version where I tuck a little cube of mozzarella in the center before cooking—pure magic when you bite into it!
Seriously, give these a try and let me know how they turn out for you! Did you add your own twist? Discover a new favorite dipping sauce? I’d love to hear about your kitchen adventures with this recipe. After all, the best recipes are the ones we make our own. Now go forth and make some amazing chicken rissoles—your taste buds will thank you!
Print
Juicy Chicken Rissoles: 30-Minute Flavor Bomb Your Family Craves
- Total Time: 25 minutes
- Yield: 8 rissoles 1x
- Diet: Low Fat
Description
Juicy and flavorful chicken rissoles made with minced chicken, herbs, and spices. Perfect for a quick meal or party appetizer.
Ingredients
- 500g minced chicken
- 1 small onion, finely chopped
- 1 egg
- 1/2 cup breadcrumbs
- 2 cloves garlic, minced
- 1 tbsp fresh parsley, chopped
- 1 tsp salt
- 1/2 tsp black pepper
- 1 tbsp olive oil
Instructions
- Mix minced chicken, onion, egg, breadcrumbs, garlic, parsley, salt, and pepper in a bowl.
- Form the mixture into small patties.
- Heat olive oil in a pan over medium heat.
- Cook the rissoles for 4-5 minutes on each side until golden and cooked through.
- Serve hot with your favorite dipping sauce.
Notes
- Use fresh breadcrumbs for better texture.
- Chill the mixture for 30 minutes before shaping for firmer patties.
- Substitute herbs with dried ones if fresh are unavailable.
- Prep Time: 15 minutes
- Cook Time: 10 minutes
- Category: Appetizer/Main
- Method: Pan-frying
- Cuisine: International
Nutrition
- Serving Size: 1 rissole
- Calories: 120
- Sugar: 1g
- Sodium: 300mg
- Fat: 5g
- Saturated Fat: 1g
- Unsaturated Fat: 3g
- Trans Fat: 0g
- Carbohydrates: 6g
- Fiber: 0.5g
- Protein: 12g
- Cholesterol: 50mg
Keywords: chicken rissoles, chicken patties, easy chicken recipe


