

You know those moments when you need a crowd-pleaser that disappears faster than you can say “dinner’s ready”? That’s exactly what happened at my nephew’s birthday last summer when I whipped up a batch of these cheeseburger sliders. Before I knew it, the platter was empty, and I had a dozen kids (and let’s be honest, adults too) begging for the recipe.
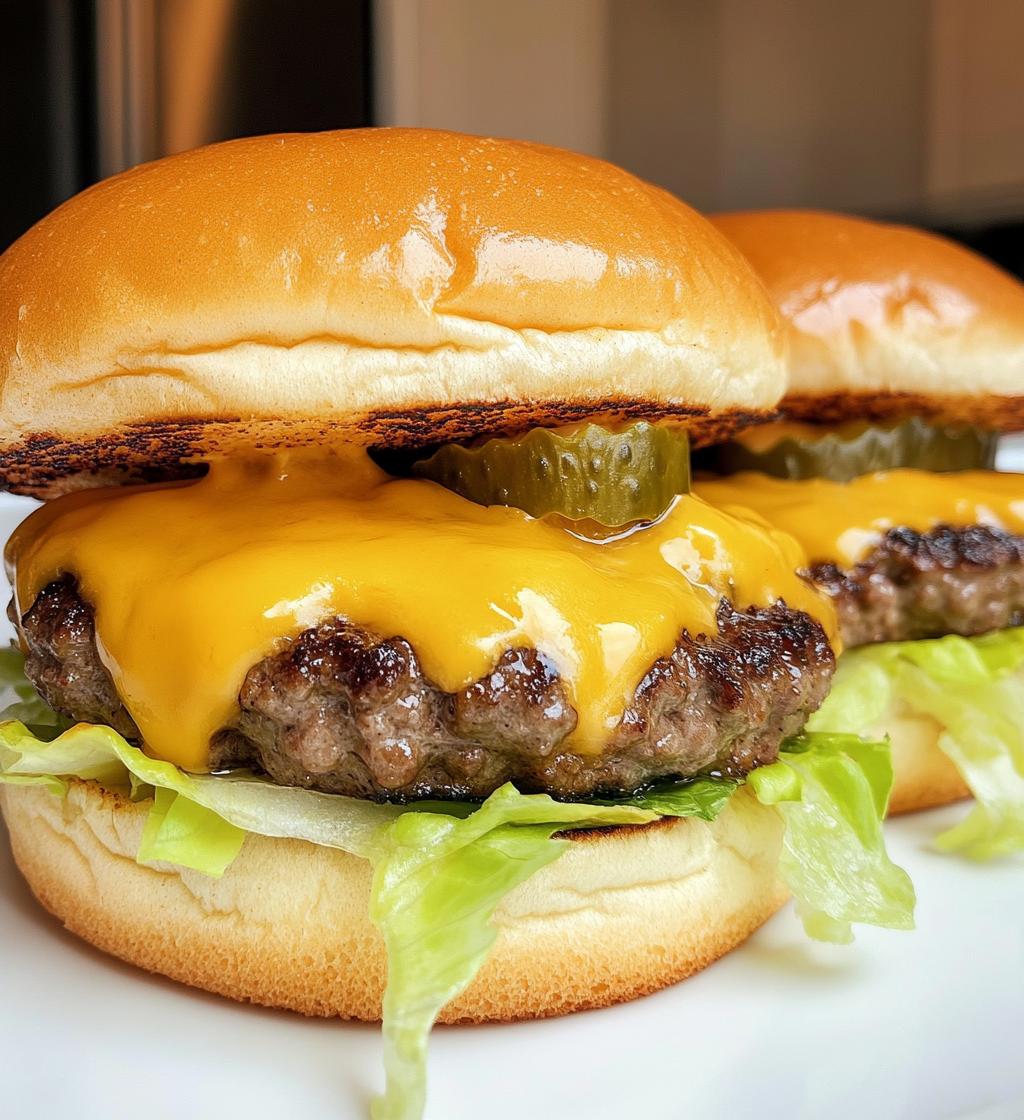
What makes these mini burgers so magical? They’ve got all the juicy, cheesy goodness of a full-sized burger but in adorable, shareable portions. I love how the cheddar melts into those perfectly seasoned patties, while the soft buns soak up just enough of that delicious burger juice without getting soggy. Whether it’s game day, a backyard BBQ, or just a Tuesday night when you want something fun, these cheeseburger sliders never disappoint.
Why You’ll Love These Cheeseburger Sliders
These sliders aren’t just food—they’re tiny happiness bombs that make everyone gather around the table. Here’s why they’ve become my go-to:
- Lightning-fast prep – Mix, shape, and cook in under 30 minutes (perfect for last-minute guests or hangry kids)
- Built for sharing – The mini size means no fighting over portions at parties (though you might fight over the last one!)
- Endless customization – Swap cheeses, add bacon, or go crazy with sauces (my brother always sneaks in jalapeños)
- Juice factor – That perfect beef-to-bun ratio means every bite drips with flavor without falling apart
- Nostalgia in a bite – All the classic burger taste you love, just more fun to eat
Ingredients for Cheeseburger Sliders
Gather these simple ingredients—most are probably already in your kitchen—and let’s make some magic happen. I’m pretty religious about my beef blend (more on that later), but feel free to tweak the toppings to match whatever’s in your fridge!
- The Burger Base:
- 1 lb ground beef (80% lean for juicy sliders – trust me on this)
- Seasoning Squad:
- 1 tsp salt (I use kosher for better distribution)
- 1/2 tsp freshly cracked black pepper
- 1 tsp garlic powder (not garlic salt!)
- 1 tsp onion powder
- Cheese & Buns:
- 6 slices cheddar cheese (halved – sharp cheddar gives that perfect melt)
- 12 slider buns (Hawaiian sweet rolls make these next-level)
- The Fixings:
- 1/4 cup each: ketchup, mustard, mayo (mix them for a quick “special sauce”)
- 1/2 cup shredded iceberg lettuce (crunch matters!)
- 1/2 cup dill pickle slices (the tang cuts through the richness perfectly)
See? Nothing fancy—just good, honest ingredients that turn into something extraordinary when combined the right way. Now let’s get cooking!
How to Make Cheeseburger Sliders
Okay, let’s turn these ingredients into the most irresistible little burgers you’ve ever tasted! I’ve made this recipe more times than I can count, and I’ve learned a few tricks to get them just right. Follow these steps, and you’ll have a platter of golden, cheesy sliders that’ll make you look like a kitchen rockstar.
Prep the Patties
First things first – don’t overwork the meat! I dump my ground beef into a big bowl and sprinkle all the seasonings right on top. Then I use my fingers (yes, get in there!) to gently mix everything just until combined. Overmixing makes tough patties, and we want these babies tender.
Now for shaping – grab small handfuls (about 2 tablespoons each) and roll them into balls. Flatten them slightly thicker than you think – they’ll shrink when cooking. Pro tip: make them about 10% wider than your buns since they’ll contract. I press a tiny dimple in the center of each patty too – this keeps them from puffing up like meatballs during cooking.
Cook the Cheeseburger Sliders
Heat your skillet or grill to medium-high – you want that satisfying sizzle when the meat hits the surface. No oil needed if you’re using cast iron! Cook the patties for about 2-3 minutes until you see that perfect brown crust form on the bottom.
Flip them carefully – these are small, so I use a thin spatula. Cook another 2 minutes, then here’s the magic moment: place half a slice of cheddar on each patty. Cover the pan for just 30 seconds to let that cheese get gloriously melty. The residual heat will finish cooking the burgers to a perfect medium doneness.
Assemble the Sliders
While the patties rest (yes, even sliders need a minute to relax!), I quickly toast the buns. Just 30 seconds cut-side down in the same pan adds amazing texture. Spread your sauces on both halves – I do mayo on top, mustard on bottom, but go wild!
Assembly line time: patty (with that oozy cheese!), then pickles, then lettuce. The lettuce acts as a moisture barrier to keep the bottom bun from getting soggy. Press the top gently so everything sticks together, then slice them apart if you’re fancy, or let everyone grab and go. Watch them disappear!
Tips for Perfect Cheeseburger Sliders
After making these sliders more times than I can count, here are my hard-won secrets for burger perfection:
- Patties should be “fat quarter” thickness – about 1/2 inch thick before cooking (they’ll shrink to ideal slider height)
- Freeze cheese slices for 10 minutes before cutting – makes them easier to halve cleanly for those petite patties
- Toast those buns! Even 30 seconds in the pan creates a moisture barrier against juicy toppings
- Lettuce layer = soggy bun insurance – always put it directly under the patty to absorb juices
- Rest patties 2 minutes before assembling – lets juices redistribute so they don’t all escape into the bread
Follow these, and you’ll be the slider hero at every gathering!
Ingredient Substitutions & Variations
One of my favorite things about these cheeseburger sliders is how easily you can mix things up based on what you’ve got or who you’re feeding. Here are the swaps and upgrades I’ve tested over the years—some born from pantry emergencies that turned out delicious!
Protein Swaps
Not a beef fan? No problem! Ground turkey or chicken work great—just add an extra teaspoon of onion powder to boost flavor. For vegetarians, those plant-based ground “meats” actually work surprisingly well here (my niece swears by the mushroom-based ones). Just watch the cooking time since they brown faster.
Cheese Adventures
While cheddar is my ride-or-die, pepper jack gives a nice kick, and Swiss makes them taste like mini cheeseburgers. Vegan cheese slices melt better than you’d expect—just cover the pan for a full minute to help them along. Pro tip: shredded cheese tends to slide off these small patties, so stick with slices when possible.
Bun Alternatives
Gluten-free? Those little GF dinner rolls work perfectly. For low-carb folks, crisp lettuce wraps make a refreshing change (just double up the leaves so they don’t tear). My personal guilty pleasure? Using those buttery crescent roll dough sheets cut into squares—it’s like a cheeseburger croissant!
Next-Level Toppings
When I’m feeling fancy, I’ll add:
- Crispy bacon strips (cut to fit—this isn’t the time for floppy ends!)
- Quick-pickled red onions (just soak thin slices in vinegar for 10 minutes)
- Sautéed mushrooms (cook them down with a splash of Worcestershire sauce)
- Avocado smash (mix ripe avocado with lime juice and salt)
The beauty is that no two batches ever have to be the same—have fun with it!
Serving & Storing Cheeseburger Sliders
Nothing beats cheeseburger sliders fresh off the grill, but I’ve learned a few tricks to keep them tasting great beyond the first serving. For parties, I pile them on a big platter with a bowl of crispy dill pickles and some spicy potato wedges—the perfect salty companions. If it’s a sit-down meal, a simple coleslaw or potato salad rounds things out nicely.
Leftovers? Just wrap them tightly in foil (assembled or separated) and refrigerate for up to 2 days. To reheat, pop them in a 350°F oven for 5-7 minutes until the cheese gets gooey again. The buns might lose some crispness, but the flavor stays fantastic!
Cheeseburger Sliders Nutrition
Okay, let’s talk nutrition – but let’s keep it real! These numbers are just estimates because we all tweak our sliders differently (extra cheese anyone?). Here’s the breakdown for one basic slider made exactly as written:
- Calories: ~220
- Fat: 12g (5g saturated from that glorious cheddar)
- Carbs: 18g (mostly from the bun, with 1g fiber)
- Protein: 12g (thanks to that quality beef!)
- Sodium: ~480mg (pro tip: low-sodium buns help if you’re watching this)
Now, here’s what my nutritionist friend always reminds me: one slider is a perfectly reasonable portion, but let’s be honest – nobody eats just one! I usually plan for 2-3 per person at parties. If you’re lightening things up, try 90% lean beef or turkey, go easy on the mayo, and load up on those veggie toppings – the pickles and lettuce add crunch without calories.
At the end of the day, these are treats meant for sharing and enjoying – every bite delivers happiness along with those macronutrients!
Cheeseburger Sliders FAQs
Over years of slider-making (and fielding questions from hungry friends), these are the things people ask most. Consider this your mini troubleshooting guide!
Can I make cheeseburger sliders ahead?
Absolutely! Here’s how I do it: Cook and assemble everything except the lettuce/pickles up to 4 hours before serving. Wrap tightly in foil and keep at room temp (if it’s under 2 hours) or refrigerate. When guests arrive, pop them in a 300°F oven for 5 minutes to rewarm, then add cold toppings. The buns stay surprisingly fresh!
What’s the best cheese for melting?
After testing dozens, my top three are:
- Cheddar (mild or sharp) – melts smoothly without separating
- American – not fancy but creates that classic diner-style melt
- Pepper Jack – adds spice while staying creamy
Avoid pre-shredded cheeses—they contain anti-caking agents that make melting weird. Pro tip: Thinner slices melt faster than thick chunks!
How do I reheat sliders without drying them out?
The oven is your friend here! Wrap sliders in foil (like a little packet) and heat at 325°F for 8 minutes. The foil traps steam to keep them moist. For extra insurance, I sometimes brush the buns lightly with beef broth before reheating. Microwave works in a pinch (15 seconds per slider), but the buns get chewy—trust me, oven is worth the wait!
I’d love to see your slider creations! Snap a pic of your cheesy masterpieces and tag me—I always get inspired by seeing how you put your own spin on these little burgers. Leave a comment below with your favorite topping combos or secret tricks. Happy slider-making, friends!
Print
Juicy 30-Minute Cheeseburger Sliders That Disappear Fast
- Total Time: 25 mins
- Yield: 12 sliders 1x
- Diet: Low Lactose
Description
Mini cheeseburger sliders perfect for parties or quick meals. Juicy beef patties with melted cheese on soft buns.
Ingredients
- 1 lb ground beef
- 1 tsp salt
- 1/2 tsp black pepper
- 1 tsp garlic powder
- 1 tsp onion powder
- 12 slider buns
- 6 slices cheddar cheese, halved
- 1/4 cup ketchup
- 1/4 cup mustard
- 1/4 cup mayonnaise
- 1/2 cup shredded lettuce
- 1/2 cup sliced pickles
Instructions
- Preheat your grill or skillet to medium-high heat.
- Mix ground beef with salt, pepper, garlic powder, and onion powder.
- Form small patties slightly larger than the buns.
- Cook patties for 2-3 minutes per side until browned.
- Place half a slice of cheese on each patty to melt.
- Toast the buns lightly if desired.
- Spread ketchup, mustard, and mayonnaise on buns.
- Add cooked patties, lettuce, and pickles.
- Serve immediately.
Notes
- Use lean ground beef for less grease.
- Customize toppings with onions or bacon.
- Double the recipe for larger gatherings.
- Prep Time: 15 mins
- Cook Time: 10 mins
- Category: Appetizer
- Method: Grilling
- Cuisine: American
Nutrition
- Serving Size: 1 slider
- Calories: 220
- Sugar: 3g
- Sodium: 480mg
- Fat: 12g
- Saturated Fat: 5g
- Unsaturated Fat: 6g
- Trans Fat: 0.5g
- Carbohydrates: 18g
- Fiber: 1g
- Protein: 12g
- Cholesterol: 35mg
Keywords: cheeseburger sliders, mini burgers, party food


