
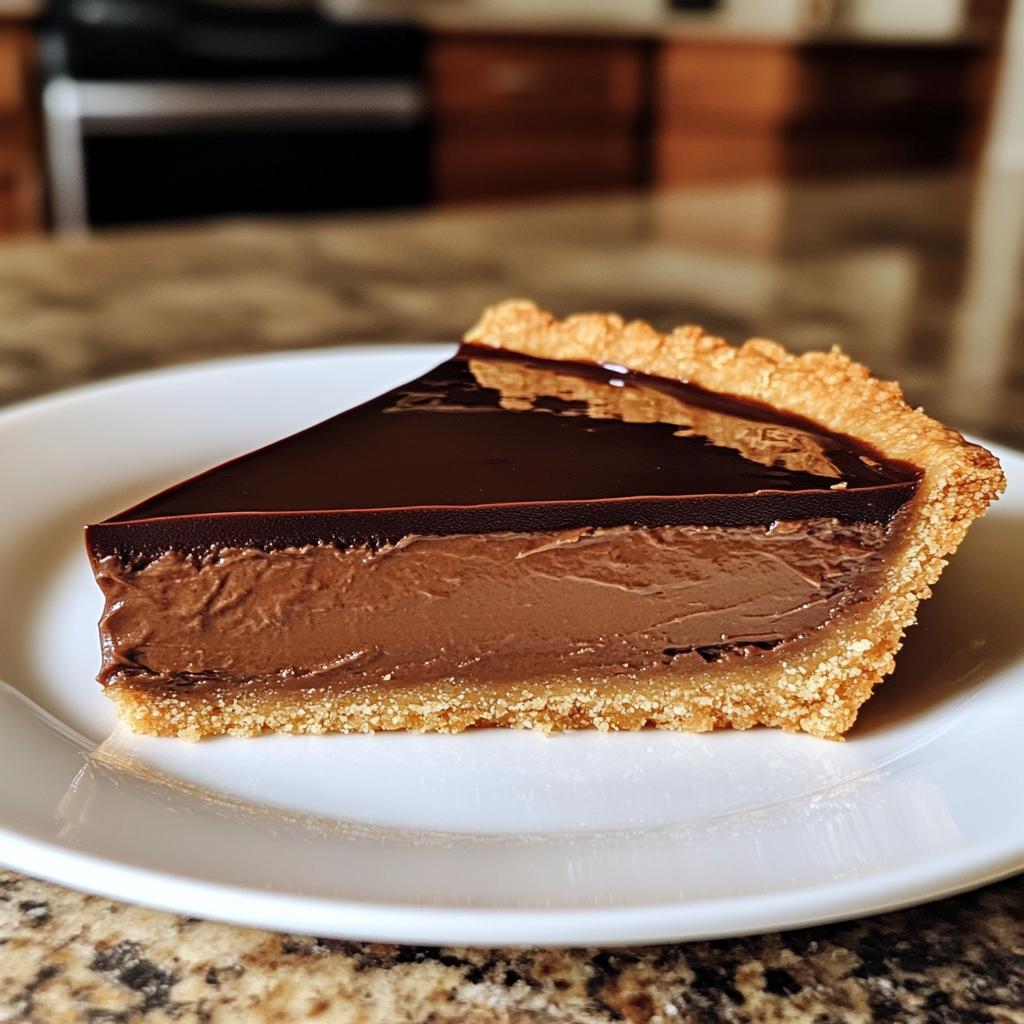
Let me tell you about my absolute favorite dessert to whip up when I want to impress without stressing – this glorious Chocolate Biscoff Tart. Picture this: a crunchy Biscoff cookie crust that smells like heaven baking, filled with silky dark chocolate so rich it’ll make your eyes roll back. It’s honestly simpler than pie (pun intended) but looks and tastes like you spent hours crafting it.
I first made this tart for my niece’s birthday party when I was short on time but needed something showstopping. The caramel-spice kick from the Biscoff paired with that decadent chocolate filling? Let’s just say nobody believed me when I said it only took 20 minutes of active work. Now it’s my go-to for everything from book club nights to “I survived Monday” celebrations.
The magic is in how foolproof it is – just crushed cookies, melted butter, and a chocolate filling that comes together effortlessly. Yet somehow, every single bite feels like pure indulgence. Trust me, this Chocolate Biscoff Tart disappears faster than you can say “second slice please.”
Everything You Need for This Dreamy Chocolate Biscoff Tart
Here’s the beautiful part – this tart only needs a handful of ingredients, and you might already have most in your pantry! I always joke that the hardest part is not eating all the Biscoff cookies before they make it into the crust. Let’s break it down:
- 200g Biscoff cookies (crushed) – That’s about 20 cookies if you’re counting. I use the original ones, but the crunchy Biscoff version works too for extra texture.
- 100g unsalted butter (melted) – Go for good quality here. I’ve learned the hard way that cheap butter can make the crust greasy instead of crisp.
- 300g dark chocolate (chopped) – Between 60-70% cocoa works best. I’m partial to Valrhona, but any good baking chocolate will do. No chocolate chips though – they don’t melt as smoothly!
- 250ml heavy cream – Also called double cream in some countries. This makes the filling luxuriously silky.
- 50g powdered sugar – Just enough sweetness to balance the dark chocolate without overwhelming it.
- 1 tsp vanilla extract – The real stuff, please! That imitation vanilla just won’t do justice to this tart.
- Pinch of salt – Don’t skip this! It makes all the flavors pop.
See? Nothing fancy or complicated. Just quality ingredients coming together to create something magical. Now grab your mixing bowls – let’s make some tart magic happen!
How to Make Chocolate Biscoff Tart
Okay, here’s where the magic happens! I promise this isn’t one of those fussy desserts that’ll have you sweating in the kitchen. We’ll tackle this in three simple phases – crust, filling, and assembly. Just follow my lead, and you’ll have the most luscious tart that’ll make everyone think you’re a pastry chef!
Preparing the Biscoff Crust
First things first – let’s make that incredible Biscoff base. I like to use my food processor because it gives me perfectly even crumbs in seconds, but a zip-top bag and rolling pin work great too (plus it’s therapeutic when you’ve had a stressful day!).
Blitz those cookies into fine crumbs – you want them sandy, with just a few tiny chunks for texture. Then drizzle in the melted butter while pulsing until it looks like wet sand. Press this heavenly mixture into your tart tin (I use a 9-inch one with removable bottom), making sure to really pack it up the sides too. A measuring cup helps get those edges nice and even!
Pop it in a 180°C (350°F) preheated oven for exactly 10 minutes – no more, no less. You’ll smell that incredible caramelized Biscoff aroma when it’s ready. Let it cool completely while you make the filling. This waiting is the hardest part – I always sneak a tiny taste of the warm crust and instantly regret not making two!
Making the Chocolate Filling
Now for the good stuff! Chop your chocolate finely (smaller pieces melt faster) and put it in a heatproof bowl. Heat the cream just until you see small bubbles around the edges – don’t let it boil or it might separate. Pour that hot cream over the chocolate, then walk away for 2 full minutes. I know it’s tempting to stir immediately, but trust me – this patience pays off!
After those agonizing minutes, stir gently with a rubber spatula starting from the center. You’ll see it transform into the silkiest chocolate ganache. Add the powdered sugar, vanilla, and that all-important pinch of salt. Keep stirring until it’s completely smooth – no lumps allowed! If your kitchen is cool and it starts thickening too much, just place the bowl over warm water briefly while stirring.
Assembling and Chilling the Tart
Here comes the satisfying part! Pour that glossy chocolate filling into your cooled crust, using the spatula to spread it evenly. Give the pan a gentle tap on the counter to release any air bubbles (this also gives you an excuse to admire how gorgeous it looks already).
Now the real test of willpower – refrigerate for at least 3 hours, though overnight is even better. I know, I know, but this waiting ensures perfect slices later. Cover loosely with plastic wrap once the top sets to prevent fridge smells. When you can gently press the surface and it doesn’t leave a fingerprint, it’s ready to blow some minds!
Pro tip from someone who’s made this countless times: Run a sharp knife under hot water and dry it before slicing for those picture-perfect wedges. And whatever you do, save me a corner piece – that’s where you get the best crust-to-filling ratio!
Tips for the Perfect Chocolate Biscoff Tart
Alright, let me share some of my tried-and-true tips to make sure your Chocolate Biscoff Tart turns out flawless every single time. These little tricks have saved me from tart disasters more than once!
First up – slicing. There’s nothing worse than a beautiful tart that crumbles when you try to serve it. Here’s my secret: run a sharp knife under hot water, wipe it dry, and then slice. Repeat this between cuts, and you’ll get clean, professional-looking wedges. And don’t rush it – let the tart sit at room temperature for 10 minutes before slicing. It makes all the difference!
Now, let’s talk garnishes. While this tart is stunning on its own, a little extra flair never hurts. My go-to is a sprinkle of crushed Biscoff cookies on top – it adds a lovely crunch and ties everything together. If I’m feeling fancy, I’ll pipe some whipped cream around the edges (add a splash of vanilla and a teaspoon of powdered sugar to the cream for extra yum). Fresh berries like raspberries or strawberries also make a beautiful and refreshing contrast to the rich chocolate.
Here’s a pro tip I learned the hard way: if you’re transporting the tart, keep it in the fridge until the last possible minute. Chocolate and heat are not friends! And if you’re worried about the top sticking to plastic wrap, place a few toothpicks in the tart before covering it – they’ll keep the wrap from touching the surface.
One last thing – don’t panic if the filling seems too soft after 3 hours of chilling. Depending on your fridge and the weather, it might need a bit longer to set perfectly. Give it another hour or two if needed. Trust me, the wait is worth it!
Serving Suggestions
Now that you’ve made this showstopper of a tart, let’s talk about how to serve it in style! This Chocolate Biscoff Tart is so versatile, it works for just about any occasion. I love bringing it out at dinner parties – it’s the perfect elegant finish to a meal, but it’s just as at home at a casual family gathering or even as a fancy treat for yourself on a cozy night in.
For plating, I like to let the tart shine on its own. A simple white or marble cake stand makes those rich chocolate tones pop. If you want to get a little fancy, drizzle some melted white chocolate over the top in a zigzag pattern – it looks impressive but takes seconds to do. A dusting of cocoa powder or powdered sugar is another quick way to elevate the look.
When I’m serving it for a special occasion, I love pairing each slice with a dollop of lightly sweetened whipped cream and a few fresh raspberries. The tartness of the berries cuts through the richness beautifully. For a winter gathering, a sprinkle of crushed peppermint candy on top adds a festive touch that everyone loves. And don’t forget the coffee – a good espresso alongside this tart is pure heaven!
This tart is also a fantastic make-ahead dessert. I’ve made it the day before bridal showers, baby showers, and even my best friend’s wedding rehearsal dinner (yes, it was a hit!). It travels well too – just keep it chilled until you’re ready to serve. Whether it’s a casual Tuesday or a big celebration, this Chocolate Biscoff Tart is always the right choice. Trust me, your guests will be begging for the recipe!
Keeping Your Chocolate Biscoff Tart Fresh and Delicious
Here’s the good news – this tart actually gets better after a day in the fridge! The flavors meld together beautifully, making leftovers (if you have any) even more incredible. But let me walk you through exactly how to store it so it stays perfect.
First, always keep it refrigerated. The filling will hold its shape beautifully for up to 5 days when properly stored. I like to cover it loosely with plastic wrap once the top has set – if you cover it while still warm, you’ll get condensation that can make the top sticky. Pro tip: place a few toothpicks in the tart before covering to keep the plastic from touching the chocolate surface.
Now, about freezing – yes, you can freeze this tart! Wrap individual slices tightly in plastic wrap, then aluminum foil, and they’ll keep for up to 2 months. When you’re ready to enjoy, just thaw overnight in the fridge. The texture holds up surprisingly well, though the crust might be slightly less crisp.
One thing to note – don’t leave this tart out at room temperature for more than 2 hours. The chocolate filling will start to soften, especially on warm days. If you’re serving it at a party, I recommend keeping it in the fridge until right before dessert time, then putting out only what will be eaten immediately.
As for reheating – you generally don’t need to! This tart is meant to be served chilled. But if you absolutely must, you can briefly warm a slice in the microwave at 50% power for about 10 seconds. Just be careful not to melt it – you want it barely warmed through, not hot.
And a final storage tip from someone who’s made this tart dozens of times: if you’re keeping leftovers in the fridge, write your name on the container. Otherwise, you might go back for a midnight snack only to find someone else got there first!
Nutritional Information
Now, I’ll be honest – when you’re indulging in something as heavenly as this Chocolate Biscoff Tart, calories might be the last thing on your mind! But since folks often ask, here’s the nutritional breakdown per slice (based on cutting the tart into 8 generous portions). Remember, these are estimates – your exact numbers might vary depending on the specific brands of chocolate or cookies you use.
Each luscious slice contains about:
- 420 calories – Because let’s face it, this is pure indulgence!
- 30g fat (18g saturated) – Mostly from that glorious chocolate and cream
- 35g carbs – Thank those Biscoff cookies and powdered sugar
- 28g sugar – The perfect balance of sweetness
- 4g protein – A little bonus from the dairy
- 3g fiber – Thanks to the dark chocolate
- 120mg sodium – Pretty reasonable for dessert
- 45mg cholesterol – Mostly from the butter and cream
Just a friendly reminder – nutrition info can vary based on ingredient brands and exact measurements. I calculate mine using my favorite baking chocolate and original Biscoff cookies. If you’re watching specific dietary needs, it’s always smart to run your exact ingredients through a calculator.
But between you and me? Sometimes dessert is about joy, not numbers. And this tart delivers joy by the slice!
Frequently Asked Questions
Can I substitute the Biscoff cookies?
Absolutely! While Biscoff gives that special caramel-spice flavor, you can use graham crackers or digestive biscuits in a pinch. The texture will be similar, though the taste will be different. For a fun twist, try gingersnaps – they’ll give a nice spicy kick that pairs beautifully with the chocolate.
What can I use instead of heavy cream?
If you’re in a bind, full-fat coconut milk (the canned kind) works surprisingly well and keeps the filling luxuriously creamy. Just be aware it might add a slight coconut flavor. For a lighter option, half-and-half will work, though your filling won’t be quite as rich.
Can I make this tart ahead of time?
You bet! In fact, I actually recommend making it at least a day before you need it. The flavors develop wonderfully overnight. Just keep it refrigerated until serving time. It holds beautifully for up to 5 days in the fridge – if it lasts that long!
Help! My filling isn’t setting. What went wrong?
First, don’t panic! This usually means either the cream wasn’t hot enough when poured over the chocolate, or it needs more chilling time. Pop it back in the fridge for another hour or two. If it’s still too soft after 5 hours, you might need to gently reheat the filling and add a bit more chocolate (about 50g extra).
Can I freeze this tart?
Yes indeed! Freeze individual slices wrapped tightly in plastic wrap and foil for up to 2 months. Thaw overnight in the fridge when ready to enjoy. The texture holds up surprisingly well, though the crust might be slightly less crisp.
Enjoy Your Chocolate Biscoff Tart
There you have it – my foolproof recipe for the most irresistible Chocolate Biscoff Tart you’ll ever make! I still remember the first time I took a bite of my own creation – that perfect crunch of spiced cookie giving way to velvety chocolate practically had me doing a happy dance in my kitchen. And now? It’s your turn to experience that magic.
Don’t be surprised if this becomes your new signature dessert. I’ve lost count of how many times friends have begged me to bring “that amazing chocolate tart” to gatherings. The best part? It looks and tastes like you spent hours in the kitchen, when really it’s one of the simplest desserts in my repertoire.
I’d love to hear how your tart turns out! Did you add any fun garnishes? Maybe a sprinkle of sea salt or a drizzle of caramel? Tag me in your photos or drop a comment – nothing makes me happier than seeing your baking triumphs. And if you’ve got any brilliant tweaks, share those too! This recipe is meant to be played with and made your own.
Now go enjoy every decadent bite of that chocolatey, Biscoff-spiced heaven. You’ve earned it! Just promise me one thing – save a slice for breakfast. I won’t tell if you don’t!
Print
20-Minute Chocolate Biscoff Tart: Irresistible Indulgence Awaits
- Total Time: 3 hours 30 minutes
- Yield: 8 servings 1x
- Diet: Vegetarian
Description
A rich and creamy chocolate tart with a crunchy Biscoff cookie crust. Perfect for any occasion, this dessert combines smooth chocolate with the spiced flavor of Biscoff cookies.
Ingredients
- 200g Biscoff cookies (crushed)
- 100g unsalted butter (melted)
- 300g dark chocolate (chopped)
- 250ml heavy cream
- 50g powdered sugar
- 1 tsp vanilla extract
- Pinch of salt
Instructions
- Preheat your oven to 180°C (350°F).
- Mix crushed Biscoff cookies with melted butter and press into a tart tin. Bake for 10 minutes, then let it cool.
- Heat the heavy cream until just simmering, then pour over the chopped chocolate. Let it sit for 2 minutes before stirring until smooth.
- Add powdered sugar, vanilla extract, and salt to the chocolate mixture. Stir well.
- Pour the chocolate filling into the cooled crust and refrigerate for at least 3 hours before serving.
Notes
- Use a food processor to crush the cookies evenly.
- Let the tart set completely before slicing for clean cuts.
- Garnish with extra crushed Biscoff cookies or whipped cream if desired.
- Prep Time: 20 minutes
- Cook Time: 10 minutes
- Category: Dessert
- Method: Baking
- Cuisine: International
Nutrition
- Serving Size: 1 slice
- Calories: 420
- Sugar: 28g
- Sodium: 120mg
- Fat: 30g
- Saturated Fat: 18g
- Unsaturated Fat: 9g
- Trans Fat: 0g
- Carbohydrates: 35g
- Fiber: 3g
- Protein: 4g
- Cholesterol: 45mg
Keywords: chocolate tart, Biscoff dessert, easy tart recipe


