
You know those desserts that disappear the second you put them out at a party? That’s exactly what happens every time I make my Better Than Anything Bars. One minute the tray’s full—next thing I know, someone’s scraping the last crumbs with their finger! These bars are pure magic—layers of buttery cake mix crust, gooey caramel, melty chocolate chips, and a fluffy whipped topping that ties it all together.
I first made these for a potluck years ago when I needed something quick but impressive. Let’s just say I’ve been asked to bring them to every gathering since. My neighbor’s kid even requested them instead of birthday cake last year! The best part? They’re embarrassingly easy to throw together—just 7 simple ingredients and 25 minutes in the oven. Trust me, the name doesn’t lie. One bite of that caramel-chocolate crunch, and you’ll understand why we call them “better than anything.”
Why You’ll Love These Better Than Anything Bars
Let me tell you why these bars are going to be your new go-to dessert:
- Crazy Easy: Seriously, if you can stir and pour, you can make these. No fancy skills required—just mix, layer, and bake.
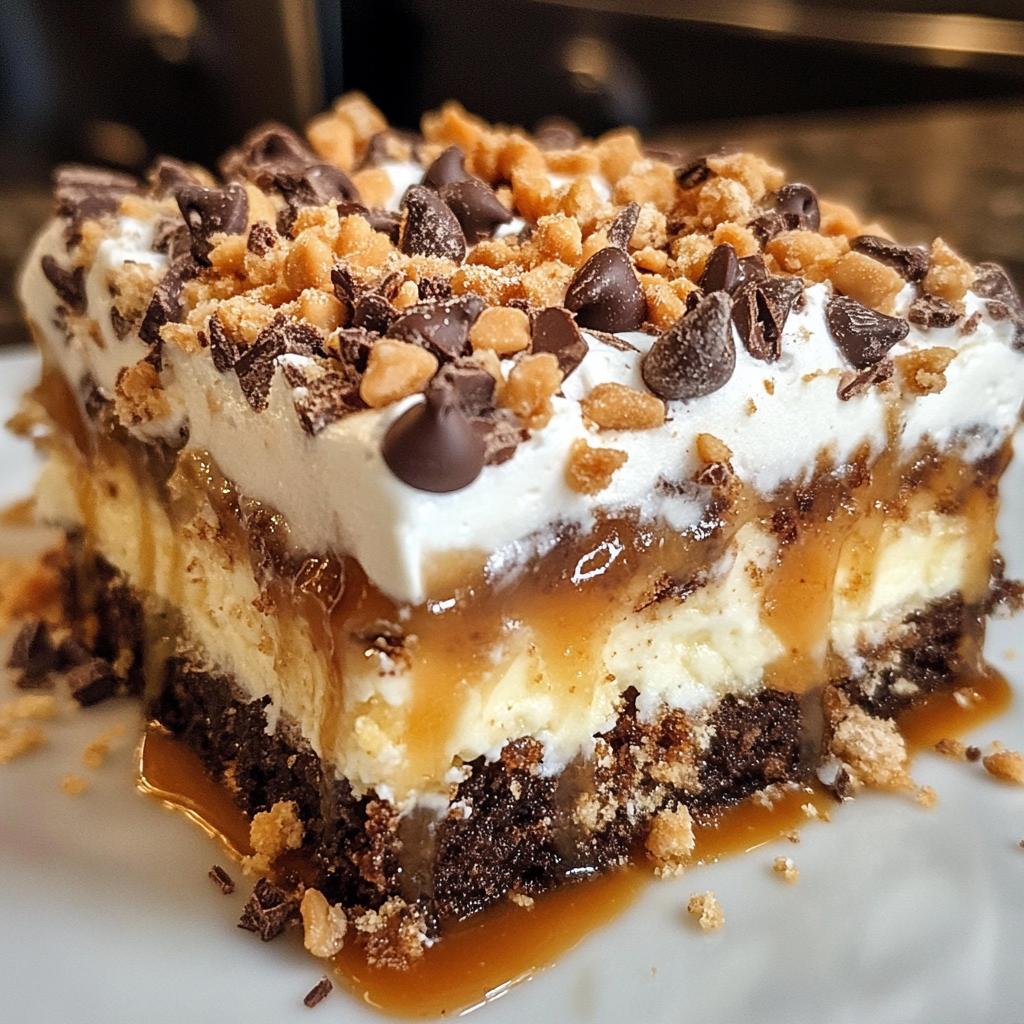
- Rich & Indulgent: Every bite is a dreamy mix of buttery crust, gooey caramel, melty chocolate, and creamy whipped topping. It’s dessert heaven.
- Crowd-Pleaser: I’ve yet to meet someone who doesn’t lose their mind over these bars. They’re perfect for parties, potlucks, or even just a Tuesday treat.
- Quick Fix: From start to finish, you’re looking at about 35 minutes. That’s less time than it takes to decide what to watch on TV!
- Customizable: Swap in your favorite toppings—nuts, white chocolate, or even a sprinkle of sea salt. It’s your call!
Trust me, once you make these, you’ll wonder how you ever lived without them.
Ingredients for Better Than Anything Bars
Here’s everything you’ll need to make these irresistible bars. I’m super particular about measurements – baking’s a science, after all! But don’t worry, we’re keeping it simple with mostly pantry staples:
- 1 box yellow cake mix (15.25 oz) – I always grab the classic Betty Crocker version
- 1/2 cup melted butter (unsalted) – Measure after melting!
- 1 large egg – Room temperature works best
- 1 can sweetened condensed milk (14 oz) – That sticky-sweet goodness
- 1 cup caramel sauce – My secret? The thick salted kind from the ice cream aisle
- 1 cup semi-sweet chocolate chips – No need to be fancy here
- 1 cup whipped topping – Thawed if frozen
- 1/2 cup crushed toffee bits – Those little crunchy bits make all the difference
Ingredient Notes & Substitutions
Listen, I’m all about working with what you’ve got! Here are my favorite swaps:
- Cake Mix: White or butter pecan works great too – just avoid anything too dense
- Caramel Sauce: Homemade is divine, but I won’t judge if you grab the jarred kind (I’ve done it!)
- Chocolate Chips: Dark chocolate or milk chocolate chips would be delicious
- Toffee Bits: Chopped pecans or walnuts add great crunch if you’re not into toffee
- Whipped Topping: Fresh whipped cream works beautifully if you’ve got heavy cream on hand
Pro tip: Set everything out on the counter before you start. There’s nothing worse than realizing your butter’s still cold when you’re ready to mix!
How to Make Better Than Anything Bars
Alright, let’s get to the fun part! These bars come together so easily you’ll be amazed. Just follow these simple steps, and you’ll have a tray of pure deliciousness in no time. I’ve made these enough times to know all the little tricks – I’ll walk you through each one!
Step 1: Prepare the Crust
First things first – preheat that oven to 350°F (175°C). While it’s heating up, grab your 9×13 baking dish and give it a good greasing. I use butter or cooking spray – just make sure you get into those corners!
Now for the crust: In a big mixing bowl, stir together the cake mix, melted butter, and egg. It’ll seem dry at first, but keep mixing until it comes together into this thick, cookie-dough-like consistency. Here’s my secret: use your hands to press it into the pan! It’s way easier than a spoon, and you’ll get a nice even layer. Press it firmly – this helps prevent crumbling later.
Step 2: Layer the Fillings
Okay, here’s where the magic happens! Pour that sweetened condensed milk evenly over the crust. Take your time with this – you want every bite to have that creamy goodness. Pro tip: tilt the pan gently to help it spread if needed.
Next, drizzle on the caramel sauce. I like to do this in a zigzag pattern first, then use a knife to swirl it just slightly into the condensed milk. Don’t overmix – you want those pretty caramel ribbons! Now sprinkle on the chocolate chips and toffee bits. I always use every last crumb of those toffee bits – they add the perfect crunch.
Step 3: Bake & Cool
Pop that beauty in the oven for 25 minutes exactly. The edges should be golden brown, and the center will look set but still a little jiggly – that’s perfect! The smell will drive you crazy, but resist the urge to cut in right away.
Let the bars cool completely before adding the whipped topping – about an hour at room temperature. I know, waiting is the hardest part! But trust me, if you add the topping too soon, it’ll just melt into a sad puddle. Once cooled, spread the whipped topping evenly, sprinkle with a few extra toffee bits if you’re feeling fancy, then cut into squares. Grab a big glass of milk – you’re in for a treat!
Tips for Perfect Better Than Anything Bars
After making these bars more times than I can count, I’ve picked up some tricks that make all the difference:
- Press that crust! Use your fingers to really pack it into the pan – this prevents crumbling when you cut the bars later.
- Room temp ingredients matter. That egg mixes in way better if it’s not straight from the fridge.
- Watch the bake time – that 25 minute mark is golden. Any longer and the caramel can get too hard.
- Cool completely before adding whipped topping. I know it’s tempting, but hot bars will melt your topping into soup!
- Chill before serving – an hour in the fridge makes them easier to cut and even more delicious.
Follow these simple tips, and you’ll get perfect bars every single time!
Storing and Serving Better Than Anything Bars
Now, let’s talk about keeping these beauties fresh – because let’s be real, they probably won’t last long! Here’s how I handle storing and serving these bars to keep them tasting their absolute best:
Storing: These bars definitely need to live in the fridge. Cover the pan tightly with plastic wrap or transfer them to an airtight container, and they’ll stay perfect for up to 3 days. The whipped topping can start to weep after that, and nobody wants soggy bars!
Serving: I always serve these chilled – the cold makes all the layers hold together better when you bite into them. If you want to get fancy, let them sit at room temperature for about 10 minutes before serving to take the chill off slightly. That way, the caramel gets just a little gooey again – pure heaven!
Freezing: You can freeze these (without the whipped topping) for up to a month! Just wrap individual bars tightly in plastic, then foil. When you’re ready to serve, thaw in the fridge overnight and add fresh whipped topping. Works like a charm for last-minute dessert emergencies!
Pro tip: If you’re taking these to a party, keep them in a cooler with ice packs until serving time. That whipped topping will stay picture-perfect, and you’ll be the dessert hero of the day!
Better Than Anything Bars Variations
Okay, let’s get creative! While I absolutely adore the classic version of these bars, sometimes it’s fun to mix things up. Here are my favorite easy twists that keep the magic alive while adding your own personal touch:
- Salty-Sweet Combo: Right after baking, sprinkle flaky sea salt over the top. That contrast with the sweet caramel? Chef’s kiss!
- Nutty Delight: Swap out the toffee bits for chopped pecans or walnuts. The extra crunch is amazing, and it gives it that “fancy bakery” vibe.
- White Chocolate Dream: Use white chocolate chips instead of semi-sweet for a creamier flavor. Bonus points if you drizzle extra melted white chocolate on top!
- Peanut Butter Lover’s: Swirl in 1/4 cup peanut butter with the caramel sauce – it melts into the most incredible gooey filling.
- Cookie Monster: Crush up some Oreos and press them into the crust before adding the other layers. Because more cookies is always better, right?
- Mocha Version: Add a tablespoon of instant coffee granules to the cake mix – gives it a subtle coffee kick that pairs perfectly with chocolate.
My neighbor Sarah once added shredded coconut to hers, and I have to admit – it was genius. The point is, don’t be afraid to play around! These bars are practically impossible to mess up. Just keep the basic proportions the same, and you can create your own signature version that’ll have everyone begging for the recipe.
Better Than Anything Bars Nutritional Info
Now, let’s be real – nobody eats these bars because they’re diet food! But if you’re curious about what you’re indulging in (or need to plan your dessert calories for the week), here’s the scoop. Just remember: these numbers are estimates and can vary based on your specific ingredients and portion sizes.
Per bar (assuming 12 servings):
- Calories: 320
- Total Fat: 14g (8g saturated)
- Cholesterol: 35mg
- Sodium: 220mg
- Total Carbohydrates: 45g
- Fiber: 1g
- Sugar: 28g
- Protein: 3g
Here’s a little secret from my kitchen: if you want to lighten things up slightly without sacrificing flavor, you can use light whipped topping and reduced-fat sweetened condensed milk. It’ll shave off about 40 calories per bar, but honestly? When I’m going for these bars, I’m all in – life’s too short to skimp on dessert!
Frequently Asked Questions
Over the years, I’ve gotten so many questions about these bars – and I love helping people make them just right! Here are answers to the ones I hear most often:
Can I freeze Better Than Anything Bars?
Absolutely! Just wait until they’re completely cooled, then freeze them without the whipped topping. Cut them first, wrap each bar tightly in plastic wrap, then foil. They’ll keep beautifully for up to a month. When you’re ready to enjoy, thaw overnight in the fridge and add fresh whipped topping right before serving.
Can I use a different cake mix flavor?
You bet! While yellow cake mix is classic, I’ve had great success with butter pecan, white, and even chocolate mixes. Just steer clear of anything too dense (like angel food mix) or you’ll lose that perfect crust texture. My aunt swears by using spice cake mix in the fall – says it tastes like caramel apple pie!
Why did my whipped topping melt?
Oh honey, I’ve been there! The bars must be completely cooled before adding the topping – like, room-temperature cooled. If they’re even slightly warm, that topping will turn into soup faster than you can say “dessert disaster.” If it happens, just pop the whole pan in the fridge for an hour to firm up.
Can I make these bars ahead?
Definitely! These actually taste even better the next day as all the flavors meld together. I often bake them the night before, refrigerate overnight, then add the whipped topping right before serving. Just keep them covered tightly so they don’t dry out.
Help! My caramel hardened after baking – what went wrong?
No worries – this usually means they baked just a tad too long. Next time, pull them out at exactly 25 minutes (use a timer!) even if they look slightly underdone in the center. The caramel will firm up perfectly as they cool. If it’s already happened, microwaving individual bars for 10 seconds softens them right up!
Final Thoughts
There you have it—my foolproof recipe for Better Than Anything Bars that’s guaranteed to impress. I can’t wait for you to try them and see why they’re always the first dessert to disappear! Let me know how they turn out—I love hearing your stories and seeing your creations. Happy baking!
Print
Better Than Anything Bars: Irresistible 7-Ingredient Magic
- Total Time: 35 minutes
- Yield: 12 bars 1x
- Diet: Vegetarian
Description
Rich and indulgent dessert bars with layers of caramel, chocolate, and whipped topping.
Ingredients
- 1 box yellow cake mix
- 1/2 cup melted butter
- 1 egg
- 1 can sweetened condensed milk
- 1 cup caramel sauce
- 1 cup chocolate chips
- 1 cup whipped topping
- 1/2 cup crushed toffee bits
Instructions
- Preheat oven to 350°F (175°C).
- Mix cake mix, melted butter, and egg in a bowl.
- Press the mixture into a greased baking dish.
- Pour sweetened condensed milk evenly over the crust.
- Drizzle caramel sauce on top.
- Sprinkle chocolate chips and toffee bits.
- Bake for 25 minutes.
- Let cool, then top with whipped topping.
- Cut into bars and serve.
Notes
- Store in the refrigerator for up to 3 days.
- Use store-bought caramel sauce for convenience.
- Substitute toffee bits with nuts if preferred.
- Prep Time: 10 minutes
- Cook Time: 25 minutes
- Category: Dessert
- Method: Baking
- Cuisine: American
Nutrition
- Serving Size: 1 bar
- Calories: 320
- Sugar: 28g
- Sodium: 220mg
- Fat: 14g
- Saturated Fat: 8g
- Unsaturated Fat: 5g
- Trans Fat: 0g
- Carbohydrates: 45g
- Fiber: 1g
- Protein: 3g
- Cholesterol: 35mg
Keywords: dessert bars, caramel chocolate, easy baking, indulgent treat


