
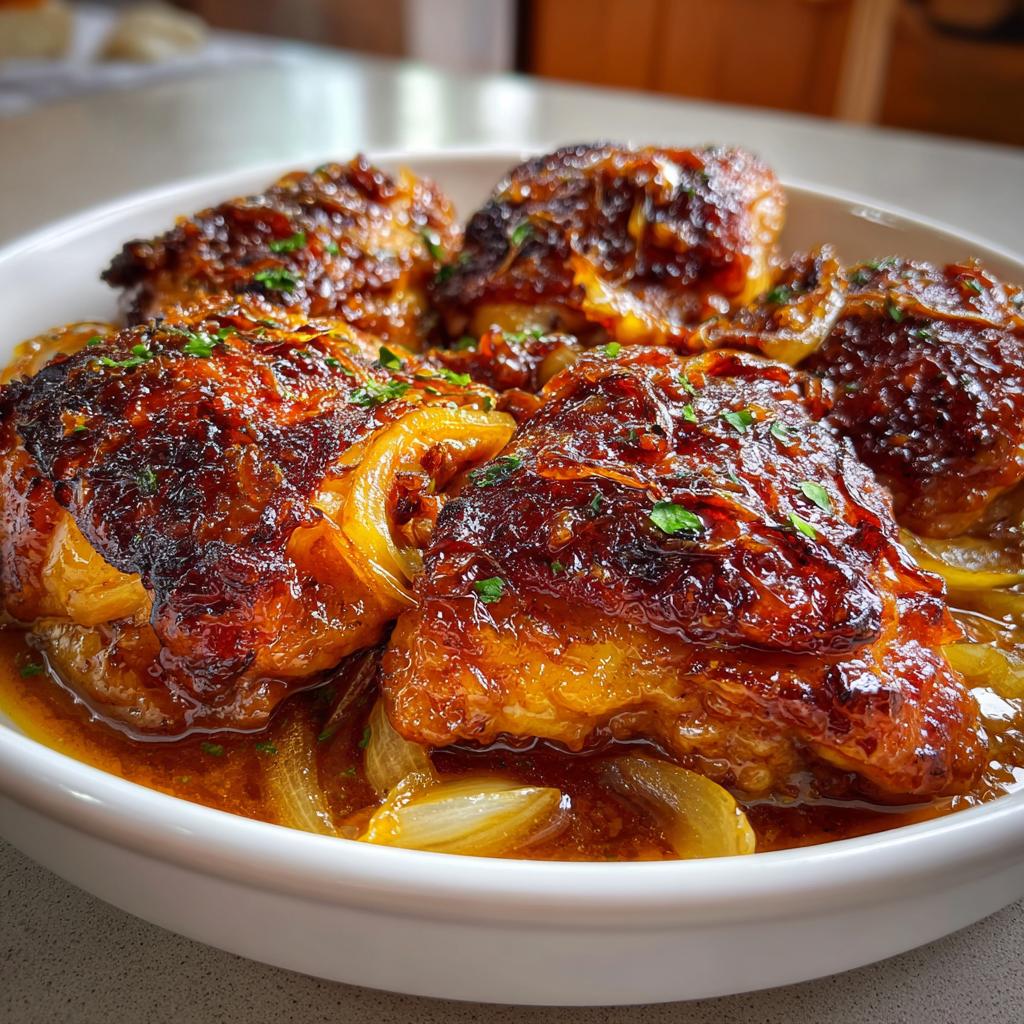
Let me tell you about my absolute favorite weeknight lifesaver – apple cider vinegar braised chicken. That tangy, savory magic happens in just one pan with ingredients you probably already have. I first tried this dish when I needed something quick but packed with flavor, and now it’s my go-to when I want to impress without the stress. The vinegar mellows into this rich, slightly sweet glaze that clings to tender chicken thighs. Trust me, it smells like heaven while cooking. Plus, it’s so versatile – throw in whatever veggies you’ve got, adjust the tang to your taste, and boom – dinner’s done.
Why You’ll Love This Apple Cider Vinegar Braised Chicken
This recipe has become my kitchen MVP for so many reasons – let me count the ways you’re going to adore it:
- Weeknight magic: From fridge to table in 40 minutes flat, with most of that being hands-off simmer time (perfect for multitasking moms like me!).
- Flavor bomb: That apple cider vinegar transforms into something magical – tangy but not sharp, with this incredible depth that makes people think you slaved for hours.
- Healthy-ish comfort food: Between the lean protein and gut-friendly vinegar, I don’t feel guilty going back for seconds (which you absolutely will).
- Your kitchen, your rules: I’ve made this with everything from sweet potatoes to kale tossed in – it’s basically a flavor playground waiting for your personal touch.
Ingredients for Apple Cider Vinegar Braised Chicken
Here’s everything you’ll need to make this tangy wonder – I promise it’s all simple stuff! Over the years, I’ve learned that quality matters most with these ingredients, especially that apple cider vinegar (more on that later). Gather these:
- 4 bone-in, skin-on chicken thighs: Don’t even think about boneless – those bones add SO much flavor during braising. The skin gets irresistibly crispy when you sear it first.
- 1 cup apple cider vinegar: Look for the cloudy, unfiltered kind with “the mother” – it’s got more complex flavor than the clear distilled stuff. Learn more about the benefits of apple cider vinegar.
- 1 large onion, sliced: Yellow onions work great here, but red onions add pretty color if you’ve got them.
- 3 garlic cloves, minced: Fresh is best! That pre-minced jarred stuff just doesn’t bloom the same way.
- 2 tbsp olive oil: My everyday extra virgin works perfectly for searing.
- 1 tsp salt: I use kosher salt – it distributes more evenly than table salt.
- 1/2 tsp black pepper: Freshly cracked if you can – the flavor difference is night and day.
- 1 tsp dried thyme: Rub it between your fingers before adding to wake up the oils.
- 1 cup chicken broth: Homemade if you’re fancy, but I won’t judge if you use low-sodium store-bought like I usually do!
See? Nothing crazy. Now let me tell you a secret – keep reading because how you handle these ingredients makes all the difference…
How to Make Apple Cider Vinegar Braised Chicken
Okay, here’s where the magic happens! Don’t let the fancy “braised” word scare you – this is just searing, simmering, and letting flavors mingle. I’ve made this dozens of times (sometimes half-asleep after work), and these steps never fail me.
Step 1: Sear the Chicken
First, pat those chicken thighs dry with paper towels – this is CRUCIAL for getting that golden crust we all crave. Heat your olive oil in a heavy skillet (I use my trusty cast iron) over medium-high until it shimmers. Season both sides of the chicken generously with salt, pepper, and thyme.
Now, listen carefully – don’t crowd the pan! I cook two thighs at a time max. They should sizzle loudly when they hit the oil. Resist the urge to move them for a good 4-5 minutes until the skin releases easily and turns golden brown. Flip and sear the other side for another 3 minutes. Transfer to a plate – they’ll finish cooking later.
Step 2: Sauté Aromatics
Same pan, lower the heat to medium. Toss in your sliced onions – they’ll pick up all those delicious browned chicken bits. Stir occasionally for about 3 minutes until they start softening. Now add the minced garlic (my favorite part – that smell!). Cook just 30 seconds more until fragrant – any longer and garlic turns bitter.
Step 3: Deglaze with Apple Cider Vinegar
Here comes the fun part! Pour in that apple cider vinegar – it’ll bubble and steam dramatically (stand back!). Use your wooden spoon to scrape up every last browned bit from the pan bottom – that’s pure flavor gold! Let it reduce for about 1 minute to take the sharp edge off the vinegar.
Step 4: Braise to Perfection
Pour in the chicken broth and nestle the seared thighs back into the pan skin-side up. The liquid should come about halfway up the chicken – add a splash more broth if needed. Bring to a gentle simmer, then cover and reduce heat to low. Set your timer for 25 minutes – no peeking!
How to know it’s done? The chicken should be fall-off-the-bone tender when prodded with a fork, and the sauce will have thickened slightly. If you have a thermometer, it should read 165°F at the thickest part. Let it rest off heat for 5 minutes before serving – this lets the flavors settle.
Tips for the Best Apple Cider Vinegar Braised Chicken
After making this dish more times than I can count, I’ve picked up some foolproof tricks that take it from good to “wow, can I have your recipe?” level. Here are my not-so-secret secrets:
Bone-in is non-negotiable
I know boneless seems easier, but trust me – those bones do the heavy lifting here. They release collagen as they cook, giving the sauce this luxurious body that makes you want to lick the plate. Plus, the skin becomes this crispy-tender masterpiece when you sear it first. My kids fight over the crispy bits!
Vinegar tang is personal
That first time I made this, I used the full cup of vinegar and nearly puckered – lesson learned! Now I start with 3/4 cup and add more after tasting. The vinegar mellows as it cooks, but you can always balance it with a teaspoon of honey if it’s too punchy. My neighbor swears by adding a splash of apple juice for sweetness.
Let it rest like a steak
I know it’s tempting to dig right in, but giving the chicken 5-10 minutes off heat makes all the difference. The juices redistribute, and the sauce thickens just enough to coat the back of a spoon perfectly. Cover loosely with foil so it stays warm without steaming.
Bonus: Make it ahead
This dish actually tastes better the next day! The flavors marry beautifully in the fridge overnight. Just gently reheat on the stovetop with a splash of broth to loosen the sauce. I often double the recipe on Sundays for easy lunches – it’s fantastic over greens or stuffed in a warm pita.
Serving Suggestions for Apple Cider Vinegar Braised Chicken
Now for my favorite part – plating up this tangy masterpiece! Over the years, I’ve discovered some perfect pairings that make this dish sing. Here’s what I keep coming back to:
Creamy mashed potatoes – the ultimate comfort combo
That tangy sauce poured over a big scoop of buttery mashed potatoes? Absolute heaven. The creaminess balances the vinegar’s zip perfectly. My quick trick: boil Yukon Golds with a garlic clove, then mash with a splash of the braising liquid instead of milk – instant flavor boost!
Crusty bread for sauce-soaking
Keep a loaf of warm, crusty bread on hand – trust me, you’ll want to mop up every last drop. I’ve seen dinner guests shamelessly swipe their fingers through leftover sauce when they think no one’s looking. A baguette works great, but my sourdough starter makes an appearance whenever I’m feeling fancy.
Simple roasted veggies for brightness
When I want something lighter, I roast whatever veggies are in season – carrots, Brussels sprouts, or asparagus tossed with olive oil and thyme. The caramelized edges play so nicely with the chicken’s richness. Last week I threw in some halved baby potatoes right in the roasting pan – one-pan win!
Pro tip: If you’ve got leftovers (rare in my house!), shred the chicken and toss it with the sauce over a bed of greens for next-day salads. The flavors deepen overnight in the most magical way.
Storage and Reheating Instructions
Here’s the beautiful thing about this apple cider vinegar braised chicken – it’s one of those rare dishes that might actually taste better as leftovers! But you’ve gotta store and reheat it right to keep that tender juiciness. Here’s exactly how I do it:
Storing leftovers like a pro
First, let the chicken cool slightly – but don’t leave it out more than 2 hours (food safety first!). Transfer everything – chicken, sauce, onions – into an airtight container. The vinegar in the sauce acts as a natural preservative, so it keeps beautifully for 3-4 days in the fridge. I’ve tried freezing it, but the texture changes just enough that I don’t recommend it.
The secret to perfect reheating
When you’re ready to enjoy round two, ditch the microwave unless you like rubbery chicken! My foolproof method: scoop the chicken and sauce into a skillet, add a splash of broth or water to loosen things up, and warm it gently over medium-low heat. Cover the pan and stir occasionally until heated through – usually about 8-10 minutes.
If you’re reheating just the sauce (maybe for meal prep bowls?), do it slowly in a small saucepan. The vinegar can sometimes intensify when reduced too much. A little pat of butter swirled in at the end brings back that luxurious texture.
P.S. That leftover braising liquid? Gold! I’ve been known to stir spoonfuls into soups or use it as a quick pan sauce for sautéed greens. Waste not, want not!
Apple Cider Vinegar Braised Chicken Variations
One of the best things about this recipe? It’s practically begging for your personal touch! Over the years, I’ve played around with so many twists – here are my favorite easy swaps that keep the soul of the dish intact while keeping things interesting:
Sweeten the deal
If that vinegar tang makes your lips pucker, try stirring in 1-2 tablespoons of honey or maple syrup with the broth. The sweetness balances the acidity beautifully. My neighbor swears by adding a handful of golden raisins during braising – they plump up and add these little bursts of sweetness that surprise you in every few bites.
Herb adventures
While thyme is classic, rosemary makes a fantastic substitute when you want something woodsy. Just use half the amount since it’s more potent. For summer vibes, I’ll toss in a big handful of fresh basil right at the end – the brightness cuts through the richness in the most delightful way.
Veggie-loaded versions
Got carrots or celery going limp in the fridge? Chop them up and sauté with the onions – they add natural sweetness and make it a complete meal. My kids don’t even notice when I sneak in shredded zucchini (just wring out the excess moisture first). Mushrooms are another winner – slice them thick so they stay meaty after braising.
Spice it up
For nights when you want some heat, add a pinch of red pepper flakes with the garlic, or stir in a tablespoon of harissa paste with the vinegar. My brother-in-law adds a few slices of fresh jalapeño to the braising liquid – just fish them out before serving unless you’re feeling brave!
The beauty is that none of these changes require adjusting cooking times or methods. Just toss in your additions and let the braising magic do its thing. Honestly, I’ve never made the exact same version twice – and that’s half the fun!
Nutritional Information
Wondering how this tangy, comforting dish fits into your eating habits? Here’s the nutritional breakdown per serving (that’s one glorious chicken thigh with sauce, folks):
- Calories: 280
- Fat: 14g (3g saturated, 9g unsaturated)
- Protein: 28g
- Carbs: 5g
- Fiber: 1g
- Sugar: 2g
- Sodium: 450mg
A little heads up – these numbers can dance around a bit depending on your exact ingredients. That chicken skin we love? It bumps up the fat content (worth it!). Using low-sodium broth? Your salt numbers will be lower. I calculate based on standard grocery store ingredients, but if you’re tracking closely for dietary needs, definitely plug your specific brands into a nutrition calculator.
What I love is how this dish packs serious protein punch without carb overload. The apple cider vinegar might even give your digestion a happy little boost – my grandma always swore by it! Just remember – nutrition is important, but so is joy… and this chicken brings both to the table.
Frequently Asked Questions
Over the years, I’ve gotten so many questions about this apple cider vinegar braised chicken – here are the ones that pop up most often with my tried-and-true answers:
Can I use boneless chicken thighs instead?
You can, but you’ll lose some magic! Bone-in thighs stay juicier during braising and give the sauce richer flavor. If you must go boneless, reduce cooking time by 5-7 minutes and maybe add a chicken wing or two to the pot for extra collagen.
How do I tone down the vinegar taste?
Three easy fixes: 1) Start with 3/4 cup vinegar instead of a full cup, 2) Let it simmer uncovered for an extra minute to mellow, or 3) Stir in a teaspoon of honey at the end. The tang also mellows overnight if you refrigerate leftovers!
Can I make this ahead of time?
Absolutely – it’s actually better on day two! Cook as directed, let cool completely, then refrigerate for up to 3 days. Reheat gently on the stovetop with a splash of broth. The flavors develop beautifully – my secret for stress-free dinner parties.
What if I don’t have apple cider vinegar?
White wine vinegar works in a pinch (use 20% less), but the apple flavor really makes this dish special. Keep a bottle in your pantry – it’s great for salad dressings and cleaning too!
Is this dish gluten-free?
Yes! Just double-check your chicken broth label if you’re sensitive. All other ingredients are naturally gluten-free. I’ve served this to celiac friends many times with zero issues.
Try this recipe tonight and tag me with your results – I love seeing your kitchen creations! Got more questions? Drop them in the comments below.
Print
Tangy Apple Cider Vinegar Braised Chicken in 40 Minutes
- Total Time: 40 minutes
- Yield: 4 servings 1x
- Diet: Low Fat
Description
A flavorful dish made with chicken braised in apple cider vinegar for a tangy taste.
Ingredients
- 4 chicken thighs
- 1 cup apple cider vinegar
- 1 onion, sliced
- 3 garlic cloves, minced
- 2 tbsp olive oil
- 1 tsp salt
- 1/2 tsp black pepper
- 1 tsp dried thyme
- 1 cup chicken broth
Instructions
- Heat olive oil in a pan over medium heat.
- Season chicken thighs with salt, pepper, and thyme.
- Sear chicken thighs until browned on both sides.
- Remove chicken and sauté onions and garlic until soft.
- Pour apple cider vinegar and chicken broth into the pan.
- Return chicken to the pan and simmer for 25 minutes.
- Serve hot.
Notes
- Use bone-in chicken for more flavor.
- Adjust vinegar amount based on preference.
- Pairs well with mashed potatoes.
- Prep Time: 10 minutes
- Cook Time: 30 minutes
- Category: Main Course
- Method: Braising
- Cuisine: American
Nutrition
- Serving Size: 1 thigh
- Calories: 280
- Sugar: 2g
- Sodium: 450mg
- Fat: 14g
- Saturated Fat: 3g
- Unsaturated Fat: 9g
- Trans Fat: 0g
- Carbohydrates: 5g
- Fiber: 1g
- Protein: 28g
- Cholesterol: 95mg
Keywords: apple cider vinegar, braised chicken, tangy chicken


