

There I was, standing in a bustling Tokyo street market, when the most incredible aroma stopped me in my tracks. Golden-brown buns sat piping hot behind a glass counter, their steam carrying whispers of spices and comfort. My first bite into a Japanese Curry Bun was pure magic – that crisp exterior giving way to pillowy soft bread, then BOOM! A flood of rich, savory curry that warmed me from the inside out. Right then, I knew I had to learn how to make these at home.
What makes Japanese Curry Buns so special is their perfect balance – the mild sweetness of the bread plays beautifully against the deep umami of Japanese-style curry. Unlike any sandwich or pastry we have here, these handheld delights wrap comfort food in edible packaging. My version sticks close to the street food original but adds a few tricks I’ve picked up through many (many!) batches.
Trust me, once you’ve had a homemade Japanese Curry Bun fresh from your kitchen, those store-bought versions just won’t compare. The way the bread stays soft for hours yet crisps beautifully when fried? Absolute perfection. Let’s make some magic!
Why You’ll Love This Japanese Curry Bun Recipe
- Crispy outside, fluffy inside: The perfect contrast of textures that’ll have you reaching for seconds.
- Rich, savory filling: Packed with flavorful Japanese curry that’s deeply comforting and satisfying.
- Customizable: Swap in your favorite proteins or veggies to make it your own.
- Street food magic at home: Bring the taste of Japan to your kitchen with this easy-to-follow recipe.
Ingredients for Japanese Curry Bun
Gathering the right ingredients is key to making these buns shine. The dough needs to be soft and springy, while the curry filling should be rich and flavorful. Here’s what you’ll need to create these handheld wonders.
Curry Filling Ingredients
- 400g Japanese curry roux (store-bought or homemade)
- 300g cooked chicken (or substitute with potatoes, carrots, and peas for a vegetarian option)
- 1 onion, finely diced
Dough Ingredients
- 300g bread flour (for that perfect chewy texture)
- 5g instant yeast (makes the dough rise beautifully)
- 30g sugar (just enough sweetness to balance the savory filling)
- 5g salt (essential for flavor)
- 1 egg (room temperature)
- 150ml warm milk (not hot, just warm to the touch)
- 30g butter (softened, not melted)
- 1L oil for frying (or for baking, just a light brush of oil)
Equipment You’ll Need
You don’t need fancy gadgets to make these buns, but a few basics will make the process smoother. Grab these trusty tools from your kitchen:
- Large mixing bowl (for that perfect dough rise)
- Rolling pin (to get those circles just right)
- Deep fryer or heavy pot (if you’re going for that classic crispy exterior)
- Baking sheet (for a lighter baked version)
- Cooking thermometer (to keep that oil at the magic 170°C)
- Pastry brush (for sealing edges or glazing)
That’s it! With just these simple tools, you’re ready to create curry bun magic.
How to Make Japanese Curry Bun
Making Japanese Curry Buns is all about patience and precision. It’s not hard, but taking your time with each step ensures you get that perfect balance of crispy bread and rich, flavorful filling. Let’s break it down so you can nail it on your first try!
Preparing the Curry Filling
Start with the filling because it needs to cool completely before you can use it. Sauté your diced onion in a pan until it’s soft and translucent – this builds the flavor base. Add your cooked chicken (or veggies) and crumble in the Japanese curry roux. Stir everything together until it’s thick and glossy. Trust me, the smell alone will make you hungry! Transfer it to a bowl and let it cool completely. Warm filling will make the dough soggy, and we don’t want that.
Making the Dough
While the filling cools, let’s make the dough. In a large mixing bowl, combine the bread flour, instant yeast, sugar, and salt. Add the egg and warm milk, then mix until it comes together. Knead the dough for about 8-10 minutes until it’s smooth. Now, add the softened butter and keep kneading until the dough is elastic and passes the windowpane test – that’s when you can stretch a small piece thin enough to see light through it without tearing. Let the dough rise in a warm spot for about an hour, or until it doubles in size.
Assembling the Buns
Punch down the dough and divide it into 8 equal portions. Roll each piece into a circle about 4 inches wide. Place 2 tablespoons of the cooled curry filling in the center. Now, here’s the trick: pinch the edges together tightly to seal the bun. Roll it gently between your palms to form a smooth ball. Let the buns rest for 30 minutes – this helps them puff up before frying.
Frying the Buns
Heat your oil to 170°C – use a thermometer to keep it steady. Carefully lower the buns into the oil and fry for 3-4 minutes per side until they’re golden brown. Don’t overcrowd the pan! If you prefer baking, preheat your oven to 180°C, brush the buns with a little oil, and bake for 20 minutes until golden. Either way, let them cool slightly before biting in – the filling will be piping hot!
Tips for Perfect Japanese Curry Buns
- Cool the filling completely: Warm curry turns your dough gummy and makes sealing a nightmare. I pop mine in the fridge for 30 minutes – patience pays off!
- Roll dough evenly: Too thick and it won’t cook through, too thin and the filling bursts out. Aim for credit card thickness – about 4mm works perfectly.
- Control that oil temp: 170°C is the sweet spot. Too cold = greasy buns, too hot = burnt outside/raw inside. My candy thermometer stays clipped to the pan the whole time.
- Seal like your snack depends on it: Pinch those edges hard, then roll smooth. Any weak spots mean curry lava leaks in the fryer – been there, cleaned that mess!
- Don’t rush the rise: Letting the shaped buns rest 30 minutes gives you that signature airy texture. They should look happily plump before frying.
Serving Suggestions for Japanese Curry Bun
Oh, the joy of biting into a warm Japanese Curry Bun fresh from the fryer! For the full experience, I love serving mine with a small bowl of miso soup – that salty umami broth just sings with the rich curry flavor. A side of Japanese pickles (tsukemono) adds the perfect tangy crunch to balance everything out. Pro tip? These taste absolute best within 30 minutes of cooking, when the bread’s still crisp and the filling’s gloriously hot. Just try not to burn your tongue – I speak from experience!
Storing and Reheating Japanese Curry Buns
These buns are best fresh, but if you have leftovers, store them in an airtight container at room temperature for up to 2 days. To bring back that crispy magic, reheat them in a 180°C oven for about 5 minutes. Avoid the microwave—it’ll make the bread soggy. Trust me, the oven trick keeps them nearly as good as when they were first fried!
Japanese Curry Bun FAQs
Can I bake instead of fry these curry buns?
Absolutely! While frying gives that classic crispy exterior, baking works beautifully too. Brush the shaped buns with egg wash or oil and bake at 180°C for about 20 minutes. They won’t be quite as crunchy, but you’ll still get that wonderful soft bread and flavorful filling combo.
Can I freeze Japanese Curry Buns?
Yes – they freeze like a dream! Let them cool completely, then wrap individually in plastic wrap before freezing. When the craving hits, thaw at room temperature and reheat in the oven to bring back some crispness. The filling keeps its flavor surprisingly well for up to 2 months frozen.
What’s the best oil temperature for frying?
170°C is the magic number – hot enough to crisp quickly without absorbing too much oil, but not so hot that the outside burns before the inside cooks. If you don’t have a thermometer, test with a small dough scrap – it should bubble actively but not burn immediately.
Can I use different fillings in the dough?
Get creative! While Japanese curry is traditional, the dough works with so many fillings. Try beef stew, creamy chicken, or even a sweet red bean paste for dessert buns. Just keep the consistency thick – runny fillings will leak out.
Why did some of my buns burst while frying?
This usually means either the filling was too warm when wrapped, the edges weren’t sealed tightly enough, or the oil was too hot. Next time, make sure the curry is completely cool, pinch those seams extra firmly, and watch that oil temperature closely!
Nutritional Information
Keep in mind these are rough estimates – your actual nutrition will vary based on exact ingredients and portion sizes. Each homemade Japanese Curry Bun contains about 320 calories, with 12g fat (3g saturated), 42g carbs (2g fiber), and 11g protein. They’re surprisingly balanced for such a satisfying snack! Remember, baking instead of frying reduces the fat content slightly if you’re watching that.
Share Your Japanese Curry Bun Experience
I’d love to hear how your curry buns turned out! Did you add any special twists to the filling? Maybe you discovered the perfect frying technique? Drop your stories in the comments below – nothing makes me happier than hearing about your kitchen adventures with this recipe.
Print
Irresistible Japanese Curry Bun Recipe in 8 Easy Steps
- Total Time: 2 hours
- Yield: 8 buns 1x
- Diet: Low Lactose
Description
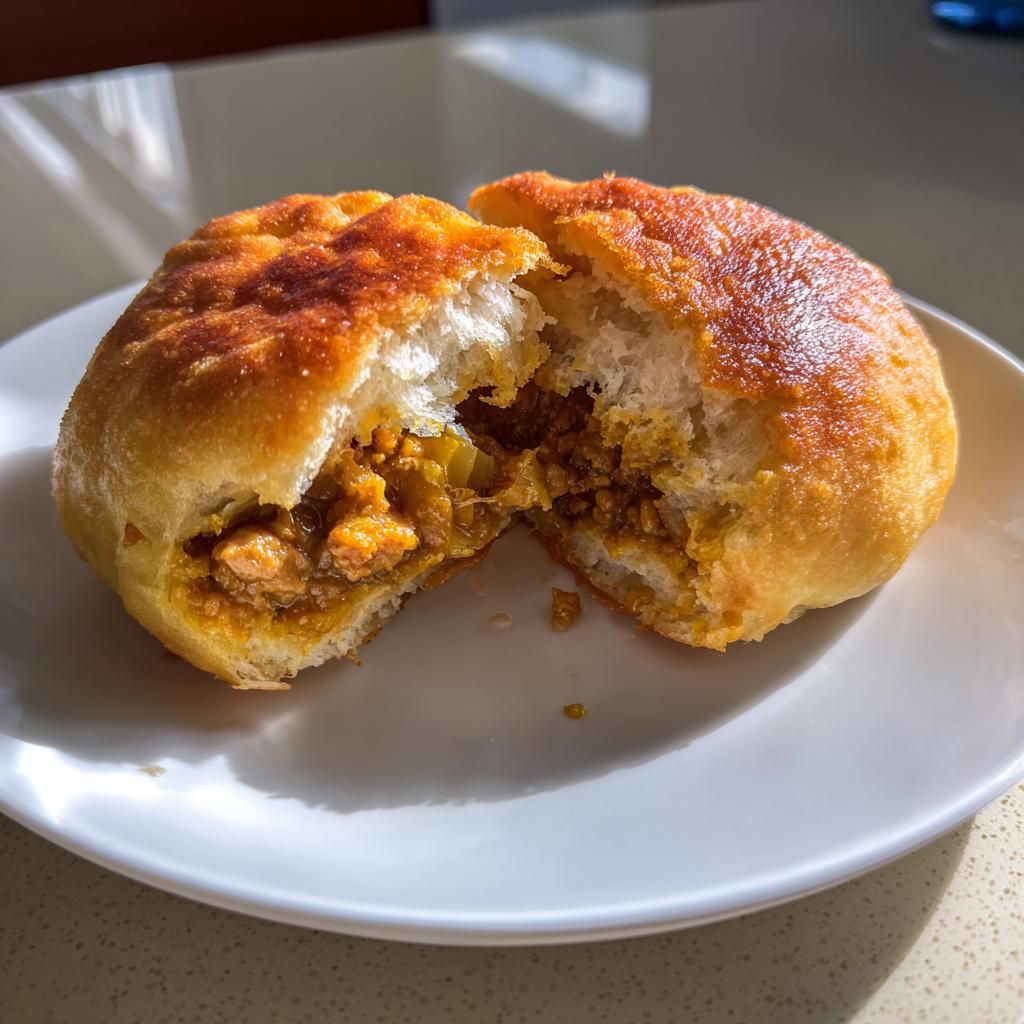
A Japanese Curry Bun is a deep-fried or baked bread filled with savory Japanese curry. The bread is soft and fluffy, while the filling is rich and flavorful. You can enjoy it as a snack or a light meal.
Ingredients
- 300g bread flour
- 5g instant yeast
- 30g sugar
- 5g salt
- 1 egg
- 150ml warm milk
- 30g butter
- 400g Japanese curry roux
- 300g cooked chicken or vegetables
- 1 onion, diced
- 1L oil for frying
Instructions
- Prepare the curry filling. Sauté diced onion until soft. Add cooked chicken or vegetables and curry roux. Stir until thick. Cool completely.
- Make the dough. Mix flour, yeast, sugar, and salt. Add egg and warm milk. Knead until smooth. Incorporate butter. Knead until elastic.
- Let the dough rise. Cover and rest in a warm place for 1 hour or until doubled.
- Divide dough into 8 equal portions. Flatten each into a circle. Place 2 tablespoons of cooled curry in the center.
- Seal the edges tightly. Shape into smooth balls. Let rest for 30 minutes.
- Heat oil to 170°C. Fry each bun for 3-4 minutes per side until golden brown.
- Drain on paper towels. Cool slightly before serving.
Notes
- Ensure the curry filling is completely cool before wrapping to prevent dough from tearing.
- Do not overfill the buns to avoid bursting during frying.
- Maintain oil temperature for even cooking and less oil absorption.
- You can bake instead of fry at 180°C for 20 minutes for a lighter version.
- Prep Time: 1 hour 30 minutes
- Cook Time: 30 minutes
- Category: Snack
- Method: Frying
- Cuisine: Japanese
Nutrition
- Serving Size: 1 bun
- Calories: 320
- Sugar: 8g
- Sodium: 480mg
- Fat: 12g
- Saturated Fat: 3g
- Unsaturated Fat: 8g
- Trans Fat: 0g
- Carbohydrates: 42g
- Fiber: 2g
- Protein: 11g
- Cholesterol: 35mg
Keywords: Japanese curry bun, curry pan, fried bread, Japanese snack, homemade curry bun


