
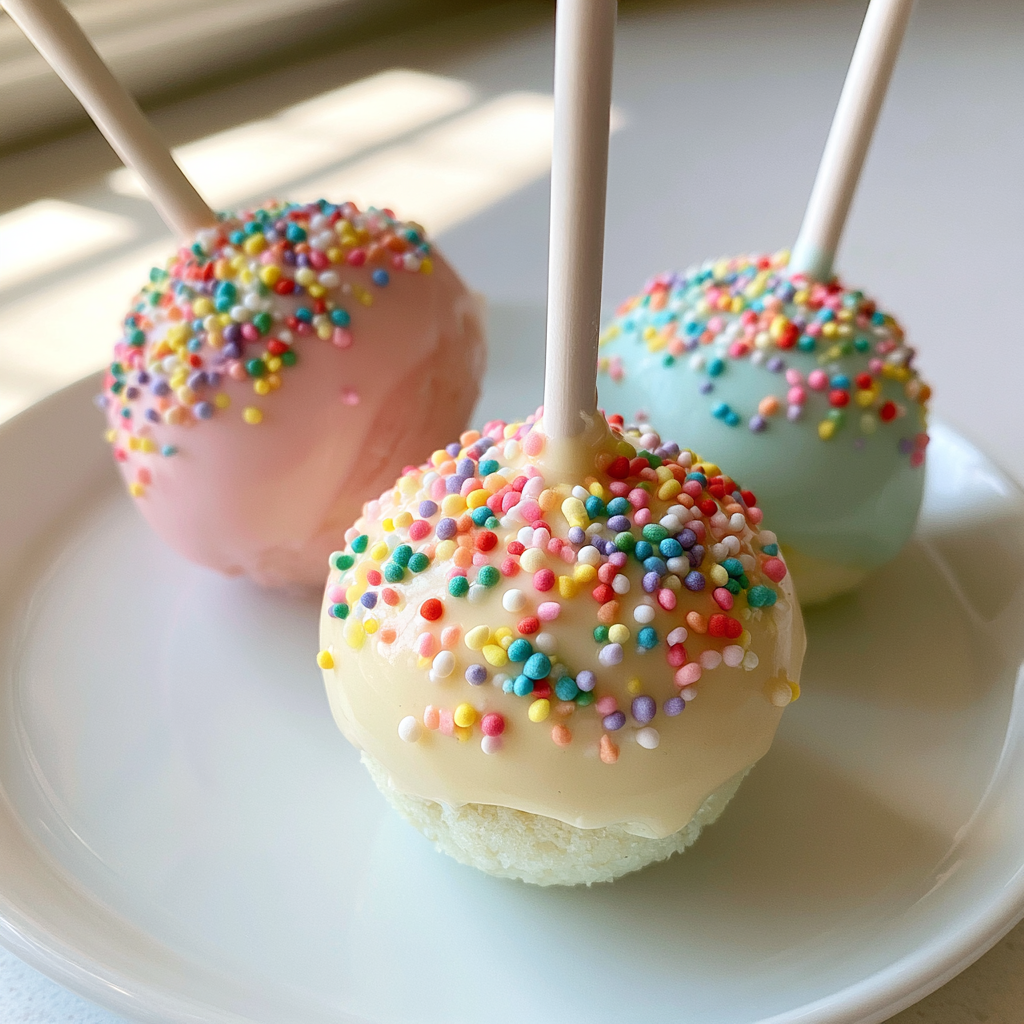
how to make cake pops: 15 minutes to perfect bite-sized treats
Are you looking for a fun and delicious way to celebrate a special occasion? Look no further than cake pops! These delightful treats are not only visually appealing but also incredibly versatile and perfect for any gathering. Whether it’s a birthday party, graduation celebration, or a simple afternoon snack, learning how to make cake pops can elevate your dessert game to new heights. Imagine a table filled with colorful cake pops, each one a miniature masterpiece that’s sure to impress your guests.
The beauty of cake pops lies in their portability and portion control. They are the ideal dessert for social gatherings, making them a favorite for dessert tables and party favors. Plus, their bite-sized nature means you can indulge without the guilt! Each pop is a little bundle of joy, crafted to deliver a burst of flavor in every bite. The soft and moist center is enveloped in a crisp coating, creating a delightful contrast that your taste buds will love.
As you embark on your cake pop-making journey, remember the pride that comes with creating something delicious from scratch. It’s an opportunity to showcase your culinary skills and creativity while celebrating life’s milestones. The joy of seeing friends and family enjoy your treats adds a special touch to every occasion.
Visual appeal is key when it comes to cake pops. Picture them adorned in vibrant colors like gold and black, representing school colors at a graduation party. You can also get creative with flavors, from classic vanilla to rich chocolate, ensuring there’s something for everyone. Each bite is sweet, creamy, and simply irresistible, making them an instant hit. So, are you ready to dive into the delightful world of cake pops?
These little treats are perfect for graduation parties, dessert tables, and as unique party favors. Their small size makes them easy to handle, allowing guests to grab one (or two!) without the mess associated with traditional cakes. With their stunning appearance, cake pops are also incredibly Instagram and Pinterest-friendly, making them a hit on social media. Your friends will be talking about these delicious delights long after the event is over.
What sets this cake pop recipe apart is its efficiency. With a yield of 30 pieces, you can easily prepare enough for a crowd without spending hours in the kitchen. The method is beginner-friendly, making it accessible for anyone, whether you’re a seasoned baker or just starting. Plus, there’s plenty of room for customization! Decorate your cake pops with caps and tassels for graduation, or choose colors that match your event theme.
Another advantage of this recipe is its suitability for bulk preparation. If you’re considering selling cake pops or need to make a large quantity for a big event, this method allows you to do just that. You can prepare your cake pops in advance, so they’re ready to go when you need them.
Let’s quickly summarize what you can expect from this cake pops recipe:
- Prep Time: 15 minutes
- Chill Time: 30 minutes
- Yield: 30 cake pops
- Skill Level: Beginner-friendly
- Perfect For: Parties, gifting, and events
What Are Cake Pops?
Cake pops are bite-sized treats made by crumbling baked cake and mixing it with frosting to form a dough-like consistency. This mixture is then shaped into small balls, placed on lollipop sticks, and coated in chocolate or candy melts. They have gained immense popularity in recent years due to their fun appearance, ease of customization, and the joy they bring to all kinds of celebrations.
Why You Will Love These Cake Pops
- Easy to prepare in bulk, making them perfect for large gatherings.
- Customizable colors and themes to suit any occasion.
- Perfect for party presentation, adding a festive touch to dessert tables.
- Kid-friendly and mess-free, making them ideal for children’s parties.
- Great for selling or gifting, ensuring a sweet treat for everyone.
Ingredients You Need
- Cake base: This provides the structure and flavor for your cake pops. You can use any flavor you like.
- Frosting: This binds the cake crumbs together and adds creaminess.
- Candy melts (or chocolate): Used for coating the cake pops, providing a smooth and beautiful finish.
- Lollipop sticks: Essential for holding your cake pops.
- Sprinkles: For decoration and added visual appeal.
How to Make Cake Pops Step by Step
- Bake the cake: Start by baking your favorite cake according to the package or recipe instructions. Allow it to cool completely.
- Crumble and mix with frosting: Once cooled, crumble the cake into a large bowl and mix in frosting until the mixture holds together.
- Shape into balls: Use your hands to roll the mixture into small balls, about 1 inch in diameter.
- Chill for firmness: Place the cake balls on a baking sheet and chill in the refrigerator for at least 30 minutes to firm up.
- Insert sticks: Once firm, insert lollipop sticks into the center of each cake ball.
- Dip into coating: Melt the candy melts according to package instructions. Dip each cake pop into the melted coating, covering it completely.
- Decorate creatively: While the coating is still wet, add sprinkles or any decorations of your choice.
Pro Tip: Chill the cake balls before dipping to prevent cracking and falling apart.
Expert Tips for Best Results
- Use fine crumbs for a smooth texture when mixing with frosting.
- Avoid adding too much frosting, as it can make the mixture too wet.
- Keep the coating temperature stable to ensure a smooth finish.
- Work in batches to maintain focus and ensure even coating.
- Use deep cups for dipping to make the process easier.
- Gently tap the cake pops after dipping to remove excess coating for a smooth finish.
Variations and Substitutions
- Chocolate cake pops version: Use chocolate cake and chocolate frosting for a rich flavor.
- Red velvet variation: Make red velvet cake pops for a festive look.
- Gluten-free cake option: Substitute with gluten-free cake mix and frosting.
- Dairy-free frosting option: Use dairy-free frosting for a vegan-friendly treat.
- Lemon or strawberry flavors: Experiment with different flavored cake mixes for a fruity twist.
How to Serve and Store
Serving: Cake pops can be displayed on dessert tables, gift boxes, or party trays for an eye-catching presentation.
Storage: They can be stored in the refrigerator for up to 1 week in an airtight container.
Freezing: Yes, they freeze well for up to 1 month. Just ensure they are individually wrapped or stored in a freezer-safe container.
Reheating: Not required, as they are best served chilled or at room temperature.
Frequently Asked Questions
How long do cake pops last?
They last up to 7 days refrigerated in an airtight container.
Can I freeze cake pops?
Yes, freeze them for up to one month. Just make sure they are properly wrapped.
Why are my cake pops cracking?
Cracking can occur due to temperature differences between the cake and the coating. Ensure both are at similar temperatures.
Can I make them ahead of time?
Yes, you can prepare them 2–3 days before the event, which makes them convenient for busy schedules.
What coating works best?
Candy melts provide a smooth and stable coating, making them ideal for cake pops.
Can I sell cake pops?
Yes, cake pops are popular and profitable party desserts. They make a great addition to any bakery or dessert business.
In conclusion, cake pops are a delightful treat that everyone will love. With their stunning visual appeal and easy preparation, you’re sure to impress your family and friends. Don’t wait any longer—try making these how to make cake pops today and share your delicious results on social media!
Print
how to make cake pops: 15 minutes to perfect bite-sized treats
- Total Time: 115
- Yield: 12 cake pops 1x
- Diet: Vegetarian
Description
Learn how to make delicious and fun cake pops that are perfect for any occasion. These bite-sized treats are easy to customize with your favorite flavors and decorations.
Ingredients
- 1 whole Cake
- 1/2 cup Frosting
- 2 cups Candy melts (or chocolate)
- 12 pieces Lollipop sticks
- to taste Sprinkles
Instructions
- Bake a cake according to the package instructions and let it cool completely.
- Crumble the cooled cake into a large bowl until fine crumbs form.
- Mix in the frosting until the mixture is well combined and holds together when pressed.
- Scoop out small portions of the cake mixture and roll them into balls, about 1 inch in diameter.
- Place the cake balls on a baking sheet lined with parchment paper and freeze for at least 30 minutes to firm up.
- Melt the candy melts according to package instructions in a microwave-safe bowl.
- Dip the end of a lollipop stick into the melted candy, then insert it into the center of a cake ball.
- Dip the entire cake ball into the melted candy, ensuring it is fully coated.
- Allow excess candy to drip off, then place the cake pop back on the baking sheet.
- While the coating is still wet, add sprinkles for decoration.
- Repeat with remaining cake balls.
- Once all cake pops are decorated, let them sit at room temperature until the coating hardens.
Notes
- You can use any flavor of cake and frosting to customize your cake pops.
- If the cake mixture is too crumbly, add more frosting until it holds together.
- Store cake pops in an airtight container at room temperature for up to a week.
- Prep Time: 15
- Cook Time: 30
- Category: Dessert
- Method: Baking
- Cuisine: American
Nutrition
- Serving Size: 1 cake pop
- Calories: 150
- Sugar: 10
- Sodium: 50
- Fat: 7
- Saturated Fat: 4
- Unsaturated Fat: 2
- Trans Fat: 0
- Carbohydrates: 20
- Fiber: 1
- Protein: 2
- Cholesterol: 15
Keywords: how to make cake pops, cake pop recipe, homemade cake pops, easy cake pops, cake pop tips, dessert ideas