
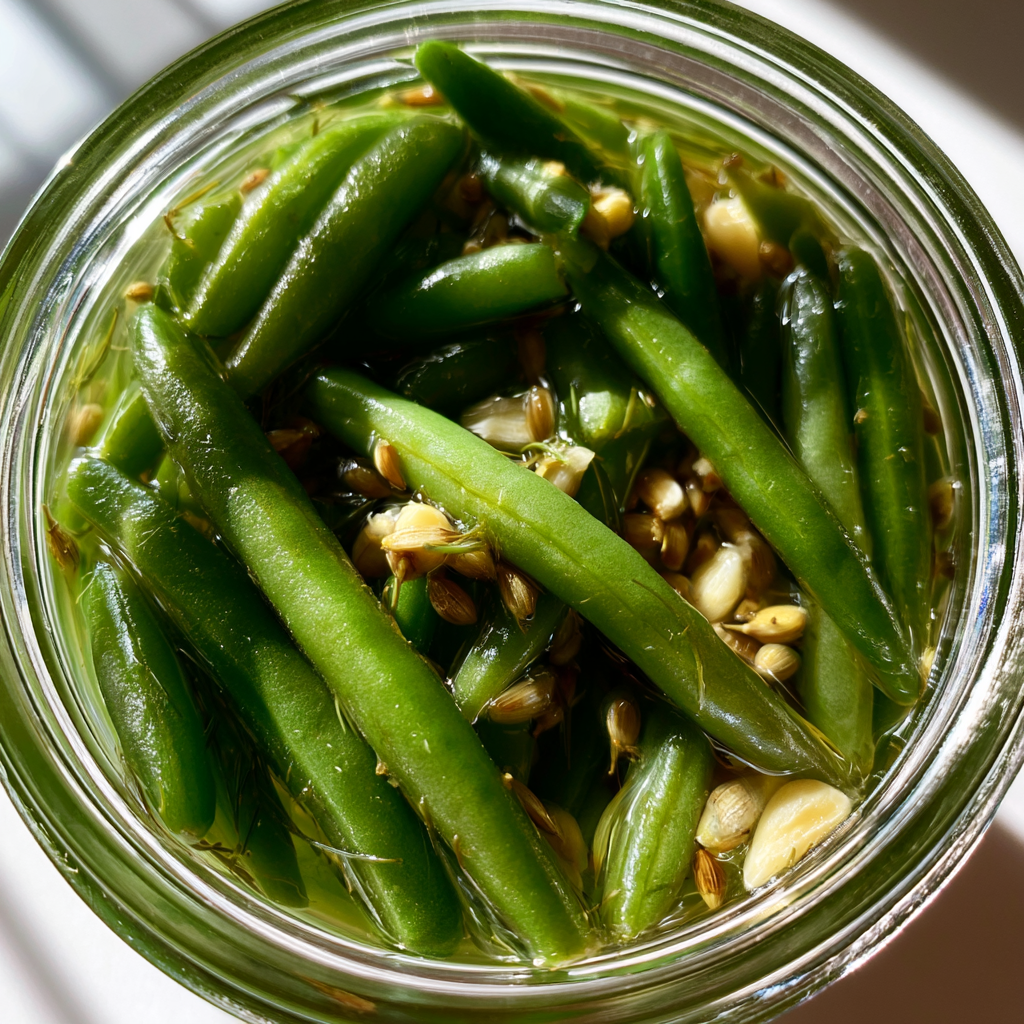
Dilly Beans: Irresistible Crisp Pickles for Summer Picnics
If you’re looking for the perfect summer snack, look no further than dilly beans. These crisp, tangy pickles bring a burst of flavor to your plate and are a delightful addition to any picnic or outdoor gathering. Imagine a sunny day with friends, laughter filling the air, and a vibrant spread of food on the table. Among those delicious offerings, a jar of homemade dilly beans shines brightly, capturing everyone’s attention with its bright green color and enticing aroma. Have you ever wondered how a simple vegetable can transform into a gourmet treat that makes every event feel extra special?
The pride of homemade dilly beans lies not just in their taste but also in their visual appeal. The bright green beans, infused with the rich flavors of garlic and dill, create a stunning contrast against the vibrant brine. Each bite offers a delightful texture—crisp on the outside, yet tender within. The taste is a harmonious blend of tangy vinegar, aromatic spices, and the fresh crunch of green beans, making them a unique and savory experience. Whether you enjoy them straight from the jar, as a side dish, or as part of a charcuterie board, these dilly beans will surely impress your guests.
As summer approaches, picnics become a staple of weekend plans. Imagine spreading out a blanket under the shade of a tree, the sun casting a warm glow on your delicious spread. Dilly beans are not just a tasty addition; they embody the spirit of summer and celebration. With their zesty crunch, they spark joy and bring people together, making them a must-have for your next gathering. The versatility of dilly beans allows them to shine in various settings—served alongside grilled meats, packed in lunchboxes, or layered in a picnic basket, they elevate the experience of outdoor dining.
Dilly beans are not just for snacking; they also serve as a fantastic conversation starter. As friends and family gather around the table, the bright colors and enticing aroma invite curiosity. Everyone will want to know your secret recipe for these irresistible pickles. The pride you feel as you share your homemade creation adds to the overall joy of the occasion. Whether you’re celebrating a birthday, hosting a barbecue, or simply enjoying a sunny afternoon, these dilly beans will leave a lasting impression.
In addition to their visual and taste appeal, dilly beans offer a practical advantage for summer events. They are incredibly easy to prepare, allowing you to make a batch ahead of time. This means more time to relax and enjoy the company of your loved ones without worrying about the food. Plus, dilly beans are portable and perfect for portion control, making them an ideal snack for picnics and gatherings. Just grab a jar, pack some plates, and you’re ready to go!
These dilly beans also shine on social media, making them an Instagram and Pinterest favorite. With their vibrant colors and delightful presentation, they’re perfect for capturing those beautiful summer moments. Their visual appeal will make your followers drool, and soon enough, they’ll be asking for your recipe. Sharing your homemade dilly beans can spark conversations and inspire others to create their own culinary masterpieces.
What sets this dilly bean recipe apart is its efficiency. This recipe yields a generous batch, ensuring there’s enough to share with friends and family. The straightforward preparation method is beginner-friendly, making it accessible for anyone wanting to dive into canning. Plus, the customization options are endless—experiment with different spices or adjust the level of heat to suit your taste preferences. This versatility makes dilly beans not just a seasonal treat but a year-round favorite.
Finally, let’s summarize the key details: this recipe takes minimal prep time, and the chilling process ensures the flavors meld beautifully. You can expect to yield several jars of crisp dilly beans, making them perfect for parties, gifting, or simply enjoying at home. Whether you’re a seasoned canner or a novice in the kitchen, these dilly beans are a fun and rewarding project to undertake.
What Are Dilly Beans?
Dilly beans are pickled green beans infused with garlic, dill, and spices. This trending snack combines the crunch of fresh beans with a tangy brine, making them a unique and flavorful treat. They are often enjoyed as a snack, side dish, or appetizer, and their vibrant appearance makes them a popular choice for charcuterie boards. The pickling process enhances the beans’ natural flavors while adding depth and complexity, making them a beloved addition to summer picnics and gatherings.
Why You Will Love These Dilly Beans
- Easy to prepare in bulk—perfect for summer gatherings.
- Customizable colors and themes to suit any occasion.
- Perfect for party presentation, adding color to your spread.
- Kid-friendly and mess-free, making them a great snack for all ages.
- Ideal for selling or gifting, spreading the joy of homemade goodness.
Ingredients You Need
- 1 pound fresh green beans, trimmed—these provide structure and flavor.
- 1 cup distilled white vinegar—essential for pickling and tanginess.
- 1 cup water—balances the flavor for a perfect brine.
- 1 tablespoon salt—enhances flavor and preserves the beans.
- 2 cloves garlic, peeled—adds aromatic depth to the pickles.
- 1 tablespoon dill seeds—imparts the signature dill flavor.
- 1 teaspoon red pepper flakes (optional)—for a touch of heat.
- 1 teaspoon black peppercorns—adds a subtle spice.
- 1 teaspoon mustard seeds (optional)—for additional flavor complexity.
How to Make Dilly Beans Step by Step
- Start by washing the green beans thoroughly and trimming the ends. Ensure they are fresh and crisp for the best results.
- Prepare the brine by combining the distilled white vinegar, water, and salt in a pot. Bring to a boil, stirring until the salt dissolves.
- Pack the trimmed green beans into sterilized jars, leaving about half an inch of space at the top.
- Add the garlic cloves, dill seeds, red pepper flakes, black peppercorns, and mustard seeds (if using) to each jar, distributing evenly.
- Pour the hot brine over the beans, ensuring they are fully submerged. Wipe the rims of the jars with a clean cloth to remove any residue.
- Seal the jars with lids and allow them to cool to room temperature.
- Once cooled, refrigerate the jars for at least 24 hours to allow the flavors to meld.
Pro Tip: For best flavor, let the dilly beans marinate in the brine for at least one week before consuming.
Expert Tips for Best Results
- Use fresh, crisp green beans for the best texture and flavor.
- Adjust the salt level based on your preference—less salt for a milder taste.
- Experiment with herbs and spices for personalized flavors—try adding thyme or bay leaves.
- Ensure jars are properly sterilized to prevent spoilage.
- Monitor the temperature of the brine to avoid cooking the beans too much during the process.
Variations and Substitutions
- Try different bean varieties, such as yellow wax beans or purple beans, for a colorful presentation.
- For a spicy kick, increase the amount of red pepper flakes or add sliced jalapeños.
- Substitute apple cider vinegar for a sweeter flavor profile.
- Use fresh dill instead of dill seeds for a more intense dill flavor.
- Add slices of onion or carrot for additional texture and taste.
How to Serve and Store
Serving: Dilly beans make an excellent addition to cheese platters, charcuterie boards, or as a tangy snack on their own. They pair wonderfully with sandwiches and barbecue dishes.
Storage: Store your dilly beans in the refrigerator for up to 2 months. Ensure jars are sealed tightly to maintain freshness.
Freezing: Dilly beans can be frozen, but the texture may change. It’s best to consume them fresh for optimal crunch.
Reheating: Not required; they are delicious served cold straight from the jar.
Frequently Asked Questions
How long do dilly beans last?
Dilly beans can last up to 2 months in the refrigerator when stored in airtight containers.
Can I freeze dilly beans?
Yes, but keep in mind that freezing may alter their crispness. They are best enjoyed fresh.
Why are my dilly beans not crunchy?
Overcooking or using older beans can lead to a loss of crunchiness. Always use fresh beans for the best results.
Can I make dilly beans ahead of time?
Absolutely! In fact, letting them sit for a week enhances their flavor before serving.
What can I use instead of vinegar?
Apple cider vinegar can be a great substitute, offering a slightly sweeter flavor.
Are dilly beans gluten-free?
Yes, dilly beans are naturally gluten-free, making them a great snack option for everyone.
In conclusion, dilly beans are an irresistible addition to any summer picnic. Their vibrant colors, crisp texture, and tangy flavor make them a standout snack or side dish. With a simple preparation process and endless customization options, they are perfect for any gathering. Try making your own dilly beans today and enjoy the delightful crunch and flavor that everyone will love!
Print
Dilly beans: Irresistible crisp pickles for summer picnics
Description
Crisp and tangy dilly beans are a delightful snack or side dish, perfect for summer picnics or as a zesty addition to your charcuterie board.
Ingredients
- 1 pound fresh green beans, trimmed
- 1 cup distilled white vinegar
- 1 cup water
- 1 tablespoon salt
- 2 cloves garlic, peeled
- 1 tablespoon dill seeds
- 1 teaspoon red pepper flakes (optional)
- 1 teaspoon black peppercorns
- 1 teaspoon mustard seeds (optional)
Instructions
- Prepare your jars: Sterilize canning jars and lids by boiling them in water for 10 minutes.
- In a medium saucepan, combine vinegar, water, and salt. Bring to a boil, stirring until salt is dissolved.
- Pack the green beans into the prepared jars, standing them upright. Add garlic, dill seeds, red pepper flakes, peppercorns, and mustard seeds evenly among the jars.
- Pour the hot vinegar mixture over the beans, leaving 1/2 inch headspace at the top of each jar. Make sure the beans are fully submerged.
- Wipe the rims of the jars with a clean cloth to remove any residue. Place the sterilized lids on top and screw on the metal bands until fingertip-tight.
- Process the jars in a boiling water bath for 5-10 minutes, ensuring they are covered by at least 1 inch of water.
- Remove jars from the water bath and let them cool completely on a towel or cooling rack.
- Once cooled, check the seals by pressing down in the center of the lids. If they don’t pop back, the jars are sealed. Store sealed jars in a cool, dark place for at least 2 weeks before enjoying.
Notes
- For a spicier version, increase the amount of red pepper flakes.
- These dilly beans can be refrigerated for up to a month if not processed for shelf-stability.
Nutrition
- Serving Size: 1 jar (approx. 12 beans)
- Calories: 45
- Sodium: 700
- Carbohydrates: 8
- Fiber: 3
- Protein: 2
Keywords: dilly beans, pickled green beans, canning recipe, summer snacks, tangy beans, homemade dilly beans