

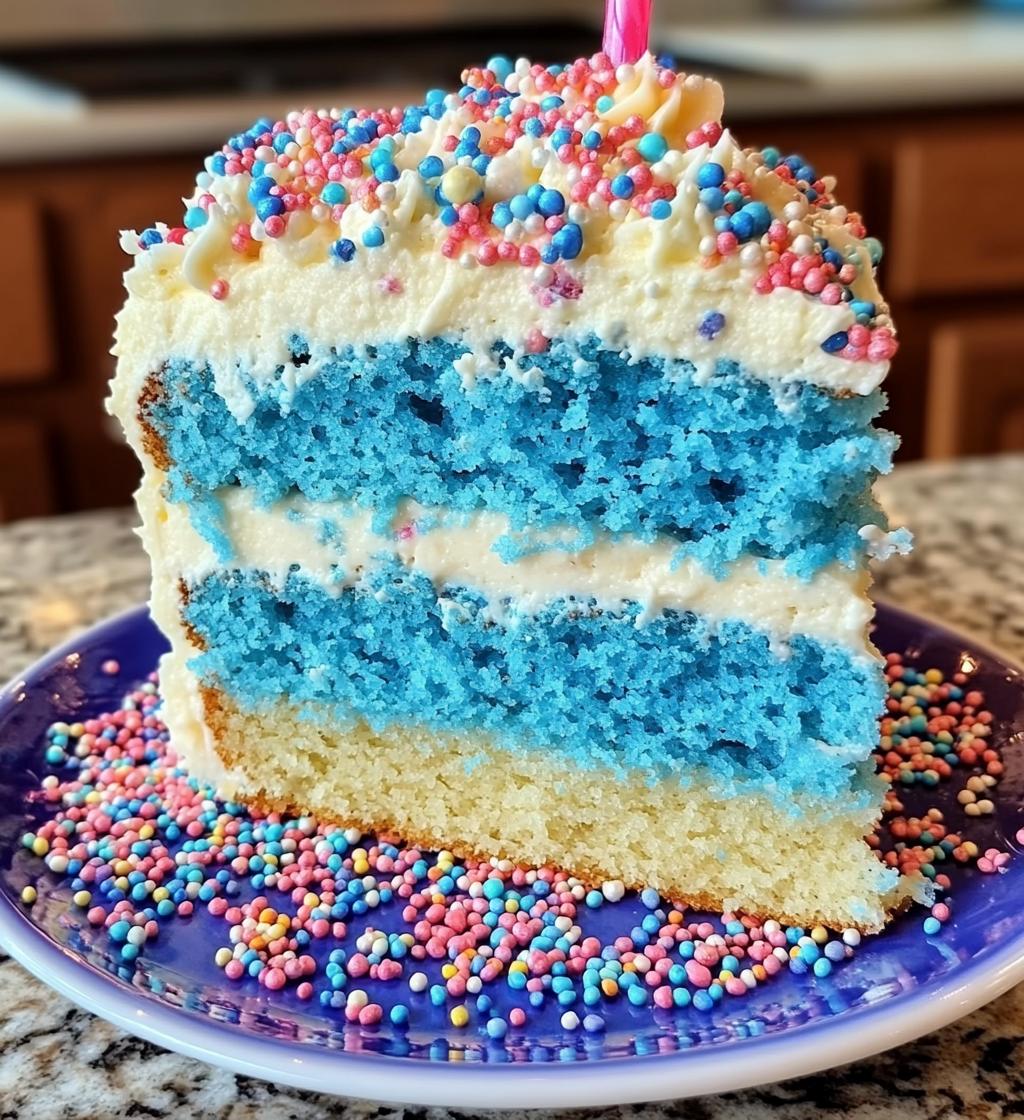
You know that feeling when you walk into a birthday party and see a cake that just screams celebration? That’s exactly what I was going for when I created this Birthday Cake Blue recipe. It all started when my niece begged for a “sky-blue cake with clouds” for her 7th birthday – and let me tell you, the look on her face when she saw it was worth every minute of mixing! This cake isn’t just another dessert; it’s pure joy baked into layers of fluffy vanilla goodness with that perfect pop of blue that makes everyone at the party stop and say “Wow!”
Why You’ll Love This Birthday Cake Blue
Honestly, this cake checks all the boxes for the perfect celebration dessert. Here’s why it’s become my go-to for birthdays (and honestly, sometimes just “Tuesdays”):
- Foolproof fun – Even if you’re not a baking pro, this recipe walks you through each step with simple techniques I’ve tested a dozen times
- That “wow” factor – The vibrant blue color makes people gasp every single time – gel food coloring is our secret weapon
- Celebration-ready from the first bite – Fluffy texture, sweet vanilla flavor, and those rainbow sprinkles just scream “party!”
Trust me, the birthday kid (or adult!) will be talking about this cake long after the last crumb disappears.
Ingredients for Birthday Cake Blue
Gathering everything before you start mixing is the secret to stress-free baking – just like my mom taught me! Here’s exactly what you’ll need for that perfect blue birthday magic:
- 2 cups all-purpose flour – spooned and leveled, not packed
- 1 1/2 cups granulated sugar – regular white sugar works best here
- 1/2 cup unsalted butter, softened (that means you can press your finger in easily)
- 3 large eggs – take them out of the fridge at least 30 minutes before
- 1 cup milk – whole milk gives the richest texture
- 1 tsp vanilla extract – the real stuff makes all the difference
- 1 1/2 tsp baking powder – check it’s not expired!
- 1/2 tsp salt – just a pinch to balance the sweetness
- Blue food coloring – gel type recommended (more on this below)
- 1 batch vanilla frosting – homemade or store-bought works
- Sprinkles for decoration – go wild with colors!
Ingredient Notes & Substitutions
Baking should be fun, not stressful! Here are my tried-and-true swaps when the pantry isn’t cooperating:
- Milk: Any dairy or non-dairy milk works – I’ve used almond milk in a pinch
- Flour: For gluten-free, use a 1:1 baking blend (add 1/4 tsp xanthan gum)
- Food coloring: Gel gives vibrant color without thinning the batter (liquid needs 2-3x more)
- Butter: In emergencies, margarine works but may change texture slightly
Pro tip: If your blue looks a bit greenish, add a tiny drop of purple food coloring to balance it out – works like magic!
Equipment You’ll Need
Listen, I’ve learned the hard way that having the right tools makes all the difference between a cake disaster and a masterpiece. Here’s exactly what you’ll want to grab before diving into this Birthday Cake Blue adventure:
- Two 9-inch round cake pans – metal ones with straight sides give the cleanest edges
- Stand mixer or hand mixer – though I’ve done it by hand when desperate (just be ready for an arm workout!)
- Wire cooling racks – crucial for preventing soggy bottoms
- Rubber spatula – for scraping every last bit of that precious blue batter
- Measuring cups and spoons – no eyeballing with baking!
- Cake tester or toothpicks – your trusty doneness detectives
- Offset spatula – makes frosting way easier, but a butter knife works in a pinch
Bonus if you have parchment paper for lining pans – it’s my secret weapon against stuck cakes. Now let’s get mixing!
How to Make Birthday Cake Blue
Okay, let’s dive into the fun part! I promise this isn’t as complicated as it looks – just follow these steps and you’ll have the most gorgeous blue cake ready to wow your guests.
Mixing the Batter
First, preheat your oven to 350°F (175°C) – this gives everything time to get nice and toasty while you mix. Now grab that softened butter and sugar (remember, softened means your finger leaves a dent but doesn’t sink right through). Cream them together for a good 2-3 minutes until they’re light and fluffy – this is where all that magical cake texture starts!
Add eggs one at a time, mixing well after each. Splash in that vanilla – the smell alone will make your kitchen heavenly. Now the secret move: alternate adding your dry ingredients (flour, baking powder, salt) with the milk, starting and ending with dry. Mix just until combined after each addition – overmixing makes tough cakes, and we want cloud-like softness!
Baking & Coloring Tips
Here’s where the magic happens! Add your blue gel food coloring a little at a time until you get that perfect sky-blue shade (I usually start with 1/4 teaspoon). Pour the batter evenly between your prepared pans – I like to use a kitchen scale to be precise. Bake for 25-30 minutes until the tops spring back when lightly touched and a toothpick comes out clean.
Pro tip: rotate pans halfway through baking if your oven has hot spots. Let cakes cool in pans for 10 minutes (patience is hard, I know!), then transfer to wire racks to cool completely – rushing this leads to frosting meltdowns!
Frosting & Decorating
The moment we’ve been waiting for! Make sure those cakes are completely cool – I sometimes pop them in the fridge for 15 minutes if I’m impatient. Spread a thin “crumb coat” layer of frosting first to trap any loose crumbs, then chill for 10 minutes before adding the final thick layer.
Now the fun part – sprinkles! Hold the cake over a baking sheet and gently press sprinkles onto the sides with your hands. For the top, I like to pour them from about a foot up so they scatter naturally. Step back and admire your masterpiece – you just made birthday magic!
Tips for the Perfect Birthday Cake Blue
After making this cake more times than I can count (sometimes just because I crave that blue happiness!), I’ve learned all the little tricks that take it from good to “blow-out-the-candles amazing.” Here’s my cheat sheet:
- Temperature matters! Room-temperature eggs and butter mix smoother – cold ingredients make lumpy batter. I leave mine out for about 45 minutes before baking.
- Gel coloring is your BFF – that little jar lasts forever and won’t water down your batter like liquid drops. Add it gradually until you get that perfect robin’s egg blue.
- The toothpick lie detector – Don’t trust the timer alone! Ovens vary. Check a few minutes early – moist crumbs sticking to the toothpick mean it’s done (no wet batter though!).
- Sprinkle strategy – Apply sprinkles immediately after frosting while it’s still sticky. For sides, tilt the cake and gently press handfuls against it over a tray to catch fallout.
- Cake surgery is okay – If your layers dome too much, just level them with a bread knife. The scraps? Chef’s treat (I won’t tell!).
Remember my biggest lesson? Baking should be joyful – if your blue isn’t perfect or your layers slide a bit, just add extra sprinkles! Happiness covers a multitude of baking sins.
Variations of Birthday Cake Blue
Listen, I love the classic version, but sometimes you want to mix things up – especially when you’re making this cake for the umpteenth birthday party of the season! Here are my favorite ways to put a fun spin on Birthday Cake Blue:
- Lemon-Berry Burst: Add 1 tbsp lemon zest to the batter and layer fresh raspberries between the cake layers with the frosting
- Cookies & Cream: Mix in 1 cup crushed Oreos with the sprinkles (the black crumbs make the blue POP!)
- Tropical Twist: Swap the vanilla extract for coconut and top with toasted coconut flakes
- Chocolate Lover’s: Use chocolate frosting instead of vanilla – the brown/blue combo is unexpectedly gorgeous
- Confetti Cake: Fold in 1/2 cup rainbow jimmies before baking for extra birthday fun
My nephew still talks about the time I made the “mermaid version” with teal ombre layers and seashell sprinkles. Really, the only limit is your imagination (and how much blue food coloring you’re willing to buy)!
Serving & Storing Birthday Cake Blue
Okay, let’s talk about keeping your masterpiece looking and tasting its best – because what’s worse than putting all that love into a cake just to have it dry out or get smooshed? Here’s exactly how I handle my Birthday Cake Blue from the first slice to the last (if it lasts that long!):
Cutting Like a Pro
For picture-perfect slices every time, I run my knife under hot water between cuts – it glides right through the frosting without dragging. This cake easily serves 12 generous slices (or 16 if you’re doing smaller kid portions). Pro tip: wipe the knife clean after each slice to keep those rainbow sprinkles looking fresh in photos!
Short-Term Storage
If you’re serving within 24 hours (let’s be real – who can resist that long?), just cover the cake with a cake dome or overturned bowl at room temperature. The frosting acts as a natural seal. Warm kitchen? Pop it in the fridge, but let it come to room temp for 30 minutes before serving – cold cake is sad cake!
Making It Last
Need to bake ahead? Here’s my method:
- Unfrosted layers: Wrap tightly in plastic, then foil. Freeze for up to 3 months – thaw overnight in the fridge before frosting
- Frosted cake: Store in an airtight container in the fridge for up to 5 days (sprinkles may bleed color after day 3)
- Individual slices: Freeze on a tray first, then wrap each in parchment and foil – perfect for surprise lunchbox treats!
One last tip: if your cake does dry out slightly, a quick 10-second microwave zap brings back that just-baked magic. Now go enjoy your blue-tiful creation – you’ve earned it!
Birthday Cake Blue Nutritional Information
Now, I’m no nutritionist (clearly, given my love for sprinkles!), but I know some folks like to keep track of these things – especially when balancing birthday indulgence with everyday eating. Here’s the scoop on what’s in each slice of this celebratory beauty:
- Serving Size: 1 slice (1/12 of cake)
- Calories: About 320
- Sugar: 25g (hey, it’s a birthday cake!)
- Sodium: 180mg
- Fat: 12g (7g saturated)
- Carbohydrates: 48g
- Protein: 4g
Important note: These nutritional values are estimates and vary based on ingredients used – homemade frosting vs. store-bought, sprinkles vs. no sprinkles, etc. If you’re counting precisely, I recommend using an online calculator with your exact brands.
My personal philosophy? Birthdays come once a year – enjoy that slice of blue happiness without guilt! But if you’re looking for lighter options, try my variations with fresh fruit or reduced-sugar frosting. You can find more recipes on our site.
FAQs About Birthday Cake Blue
After years of baking this showstopper for every birthday under the sun, I’ve answered more questions than candles on a centenarian’s cake! Here are the ones that pop up most often (along with my tried-and-true solutions):
Can I make the cake layers ahead of time?
Absolutely! The unfrosted layers freeze beautifully for up to 3 months – just wrap them tightly in plastic wrap, then foil. Thaw overnight in the fridge before frosting. I often bake them the weekend before a party to spread out the work.
Help! My frosting keeps crumbling – what’s the fix?
This usually happens with homemade frosting that’s too thick. Try beating in 1 teaspoon of milk at a time until it reaches spreading consistency. If it’s store-bought frosting that hardened in the fridge, let it sit at room temp for an hour, then whip it with your mixer to restore fluffiness.
Why does my blue color look greenish?
Ah, the classic blue/green dilemma! It’s usually because yellow undertones in the butter and eggs are messing with your color. Next time, add a tiny drop of purple food coloring to neutralize the yellow – works like magic to get that true blue hue.
Can I use this recipe for cupcakes?
You bet! Fill lined cupcake tins 2/3 full and bake at the same temperature for 18-22 minutes. This recipe makes about 24 standard cupcakes – perfect for classroom birthdays where slicing a whole cake would be chaos!
How do I keep sprinkles from bleeding color into the frosting?
For picture-perfect sprinkles that stay vibrant, apply them no more than 4 hours before serving. Store-bought sprinkles tend to bleed less than homemade. If you must decorate ahead, keep the cake refrigerated until the last minute – cold slows down color transfer.
Still got questions? Drop them in the comments – I’m happy to troubleshoot any baking emergencies! After all, every great birthday cake comes with a few learning curves (and probably some blue fingers).
Share Your Birthday Cake Blue
Okay, confession time – nothing makes me happier than seeing YOUR versions of this Birthday Cake Blue! Whether it turned out picture-perfect or had a little “character” (we’ve all been there), I want to celebrate your baking victory with you. Here’s how we can keep the birthday magic going:
- Snap a pic of your masterpiece (or the hilarious decorating attempt by your kids) and tag me on Instagram – I’ll feature my favorites!
- Leave a star rating below – did it earn 5 sprinkles? 3? Be honest!
- Share your tweaks in the comments – did you add lemon? Try ombre layers? Your ideas might inspire someone else’s next birthday bash
Seriously, seeing your creations makes my day brighter than that blue batter! And if things went sideways? Tell me that too – we’ll troubleshoot together for next time. Now go enjoy that cake – you’ve earned every crumb!
Print
2 Foolproof Steps to Magical Birthday Cake Blue
- Total Time: 50 minutes
- Yield: 1 cake (serves 12) 1x
- Diet: Vegetarian
Description
A delicious and festive birthday cake with a blue theme, perfect for celebrations.
Ingredients
- 2 cups all-purpose flour
- 1 1/2 cups granulated sugar
- 1/2 cup unsalted butter, softened
- 3 large eggs
- 1 cup milk
- 1 tsp vanilla extract
- 1 1/2 tsp baking powder
- 1/2 tsp salt
- Blue food coloring (as needed)
- 1 batch vanilla frosting
- Sprinkles for decoration
Instructions
- Preheat oven to 350°F (175°C). Grease and flour two 9-inch round cake pans.
- In a bowl, mix flour, baking powder, and salt.
- In another bowl, cream butter and sugar until light and fluffy.
- Beat in eggs one at a time, then add vanilla.
- Alternately add dry ingredients and milk, mixing until smooth.
- Add blue food coloring until desired shade is reached.
- Divide batter evenly between pans. Bake for 25-30 minutes or until a toothpick comes out clean.
- Cool cakes in pans for 10 minutes, then transfer to wire racks.
- Once cooled, frost the cake and decorate with sprinkles.
Notes
- For a deeper blue, use gel food coloring.
- Ensure all ingredients are at room temperature for best results.
- Let cakes cool completely before frosting to prevent melting.
- Prep Time: 20 minutes
- Cook Time: 30 minutes
- Category: Dessert
- Method: Baking
- Cuisine: American
Nutrition
- Serving Size: 1 slice
- Calories: 320
- Sugar: 25g
- Sodium: 180mg
- Fat: 12g
- Saturated Fat: 7g
- Unsaturated Fat: 4g
- Trans Fat: 0g
- Carbohydrates: 48g
- Fiber: 1g
- Protein: 4g
- Cholesterol: 70mg
Keywords: birthday cake, blue cake, celebration cake, homemade cake


