
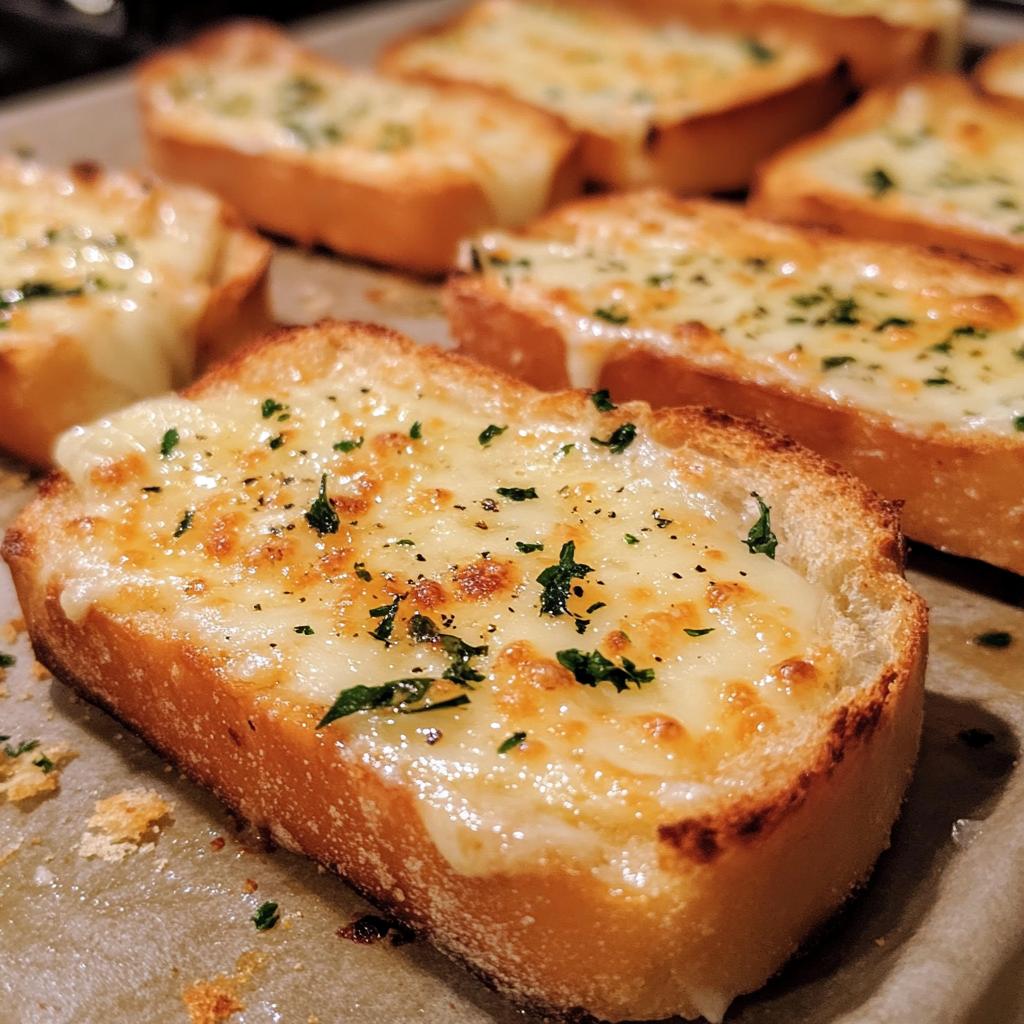
Oh my gosh, let me tell you about my absolute weakness – that first bite of warm, crispy, cheesy garlic bread fresh from the oven. You know the kind I mean? Where the butter soaks into every nook of the bread, the garlic makes your whole kitchen smell like heaven, and the cheese stretches for miles when you pull a piece apart. That’s exactly what this Best Cheesy Garlic Bread recipe gives you every single time.
I’ve been making this version for years – ever since my college roommate taught me her family’s secret method. We’d whip up a batch late at night while studying (okay, mostly procrastinating), and I swear it made everything better. Now it’s my go-to for everything from pasta nights to game day snacks. The trick is in that perfect balance of crispy edges, buttery middle, and just enough garlic to make it irresistible without being overpowering.
What makes this recipe special? It’s dead simple but feels luxurious. With just a few basic ingredients and about 20 minutes, you can transform a plain loaf of bread into something magical. Trust me, once you try this method, you’ll never go back to store-bought garlic bread again.
Why You’ll Love This Best Cheesy Garlic Bread
Let me count the ways this recipe will become your new favorite:
- Effortless magic: Just 5 minutes of prep transforms basic ingredients into something extraordinary
- That golden crunch: The perfect balance of crispy edges and soft, buttery centers
- Crowd-pleaser: Disappears faster than you can say “garlic breath” at parties
- Versatile superstar: Equally at home beside spaghetti or as game day fuel
- Customizable: Swap cheeses or add herbs based on what’s in your fridge
Seriously – it’s the kind of simple recipe that makes you look like a kitchen rockstar with zero stress.
Ingredients for the Best Cheesy Garlic Bread
Here’s what you’ll need to make garlic bread magic happen (and why each ingredient matters):
- 1 loaf French bread or baguette – The perfect sturdy base that gets crispy outside while staying soft inside
- 1/2 cup unsalted butter, softened – Must be softened to room temp so it spreads like a dream
- 4 cloves garlic, minced – Fresh is non-negotiable for that punchy, aromatic flavor
- 1/4 cup fresh parsley, chopped – Adds that bright green freshness to cut through the richness
- 1 cup shredded mozzarella – The meltiness we all crave
- 1/2 cup grated Parmesan – For that salty, nutty kick
- 1/2 tsp salt & 1/4 tsp black pepper – Simple seasoning that makes everything pop
See? Nothing fancy – just quality ingredients treated right. That’s the secret!
Equipment You’ll Need
Don’t worry – you probably have everything already! Just grab:
- A trusty baking sheet (lined with foil for easy cleanup)
- Mixing bowl for that glorious garlic butter
- Sharp knife for slicing bread and mincing garlic
- Spoon or spatula to spread the goodness
See? No fancy gadgets needed – just the basics from your kitchen drawers!
How to Make the Best Cheesy Garlic Bread
Okay, let’s get to the good part – turning that pile of ingredients into golden, cheesy perfection! The process is so simple you’ll have it memorized after one try, but I’ll walk you through each step to make sure your garlic bread turns out absolutely irresistible.
Step 1: Prepare the Garlic Butter Mixture
First, grab that softened butter (seriously, if it’s not soft, you’ll have a terrible time spreading it – trust me, I’ve learned the hard way!). Mash it up in a bowl with the minced garlic, chopped parsley, salt, and pepper. Go ahead and really mix it well – you want every bite to have that garlicky goodness evenly distributed. Now take your time spreading this magic paste all over both halves of the bread, getting right into all those little nooks. The more thorough you are here, the more flavor in every bite!
Step 2: Assemble and Bake
Now the fun part – the cheese! Sprinkle that mozzarella first – it’s your melty base layer. Then comes the Parmesan for that salty, nutty kick. Don’t be shy with it! Pop your loaded bread onto a baking sheet and into a 375°F oven for about 10-12 minutes. You’ll know it’s ready when the cheese is bubbling like crazy. But wait – here’s my secret trick: switch to broil for just 1-2 minutes at the end. That’s what gives you those gorgeous golden brown spots and extra crispy edges. Watch it closely though – it goes from perfect to burnt in seconds!
Pull it out when it looks too good to resist, let it cool for just a minute (if you can wait that long), then slice and serve immediately while the cheese is still stretching gloriously.
Tips for the Best Cheesy Garlic Bread
After making this recipe more times than I can count, here are my can’t-live-without tips:
- Garlic is king: Always use fresh cloves – that jarred stuff just doesn’t give the same punch
- Cheese experiments welcome: Try adding a sprinkle of sharp cheddar or smoked gouda for fun twists
- Broiler vigilance: Stay put during those last 2 minutes – I’ve rescued many batches from the brink of disaster!
- Reheat like new: Leftovers? Pop slices in a 350°F oven for 5 minutes to bring back the crisp
- Herb swap: No parsley? Fresh basil or oregano work beautifully too
Remember – great garlic bread is all about personal touches and watching it like a hawk at the end!
Serving Suggestions
This cheesy garlic bread shines in so many ways! Tear it apart as the ultimate appetizer with marinara for dipping, pair it with your favorite pasta (it’s practically mandatory with spaghetti), or serve alongside a cozy soup. My family even fights over the last piece at breakfast – yes, it’s that good any time of day!
Storage and Reheating
Okay, confession time – I rarely have leftovers because this garlic bread disappears so fast! But if you’re lucky enough to have some, here’s how to keep it tasting fresh: store any cooled leftovers in an airtight container at room temp for up to 2 days. When you’re ready to enjoy, skip the microwave (it makes the bread soggy!) and reheat slices in a 350°F oven for 5 minutes – it’ll come out nearly as good as fresh. The broiler trick works miracles here too for bringing back that perfect crispiness!
Nutritional Information
Just so you know, these numbers are rough estimates – your exact counts will vary based on bread size, cheese brands, and how generously you slather on that garlic butter! A typical serving comes in around 220 calories with all that melty, garlicky goodness we can’t resist.
Frequently Asked Questions
Can I use a different type of cheese?
Absolutely! While mozzarella and Parmesan are my go-tos, I’ve had great success with provolone, Asiago, or even a sprinkle of sharp cheddar. Just keep one melty cheese in the mix – that stretchy pull is half the fun!
Can I freeze cheesy garlic bread?
You sure can – just wrap tightly in foil before freezing. When the craving hits, bake from frozen at 375°F for 15-20 minutes. But honestly? It’s so quick to make fresh, I rarely bother!
Any vegan alternatives?
Definitely! Swap the butter for vegan butter (or olive oil in a pinch) and use your favorite dairy-free cheeses. The garlic-parsley flavor still shines through beautifully.
Why does my garlic sometimes taste bitter?
Ah, the broiler is tricky! If garlic burns even slightly, it turns bitter. That’s why I always keep a close eye during those last couple minutes – golden is good, dark brown means trouble!
Can I make this ahead for parties?
Prep the bread with butter and cheese up to 4 hours ahead, then just pop in the oven when guests arrive. The smell alone will make you the host of the year!
Share Your Feedback
I’d love to hear how your cheesy garlic bread turned out! Did you add any fun twists? Snap a pic of that melty goodness and tag me – nothing makes me happier than seeing your kitchen victories. Now go enjoy every garlicky, buttery bite!
Print
32-Minute Best Cheesy Garlic Bread: Irresistibly Crispy & Melty
- Total Time: 22 minutes
- Yield: 8 servings 1x
- Diet: Vegetarian
Description
Make the best cheesy garlic bread with this simple recipe. Crispy, buttery, and loaded with melted cheese, it’s perfect as a side dish or appetizer.
Ingredients
- 1 loaf French bread or baguette
- 1/2 cup unsalted butter, softened
- 4 cloves garlic, minced
- 1/4 cup fresh parsley, chopped
- 1 cup shredded mozzarella cheese
- 1/2 cup grated Parmesan cheese
- 1/2 teaspoon salt
- 1/4 teaspoon black pepper
Instructions
- Preheat oven to 375°F (190°C).
- Slice the bread in half lengthwise.
- In a bowl, mix butter, garlic, parsley, salt, and pepper.
- Spread the butter mixture evenly on both halves of the bread.
- Sprinkle mozzarella and Parmesan cheese on top.
- Place the bread on a baking sheet and bake for 10-12 minutes until the cheese is melted and bubbly.
- Broil for 1-2 minutes for extra crispiness.
- Slice and serve warm.
Notes
- Use fresh garlic for the best flavor.
- For extra richness, add a sprinkle of cheddar cheese.
- Store leftovers in an airtight container and reheat in the oven.
- Prep Time: 10 minutes
- Cook Time: 12 minutes
- Category: Side Dish
- Method: Baking
- Cuisine: Italian
Nutrition
- Serving Size: 1 slice
- Calories: 220
- Sugar: 1g
- Sodium: 380mg
- Fat: 14g
- Saturated Fat: 8g
- Unsaturated Fat: 5g
- Trans Fat: 0g
- Carbohydrates: 18g
- Fiber: 1g
- Protein: 7g
- Cholesterol: 35mg
Keywords: cheesy garlic bread, garlic bread recipe, easy appetizer, homemade garlic bread


