
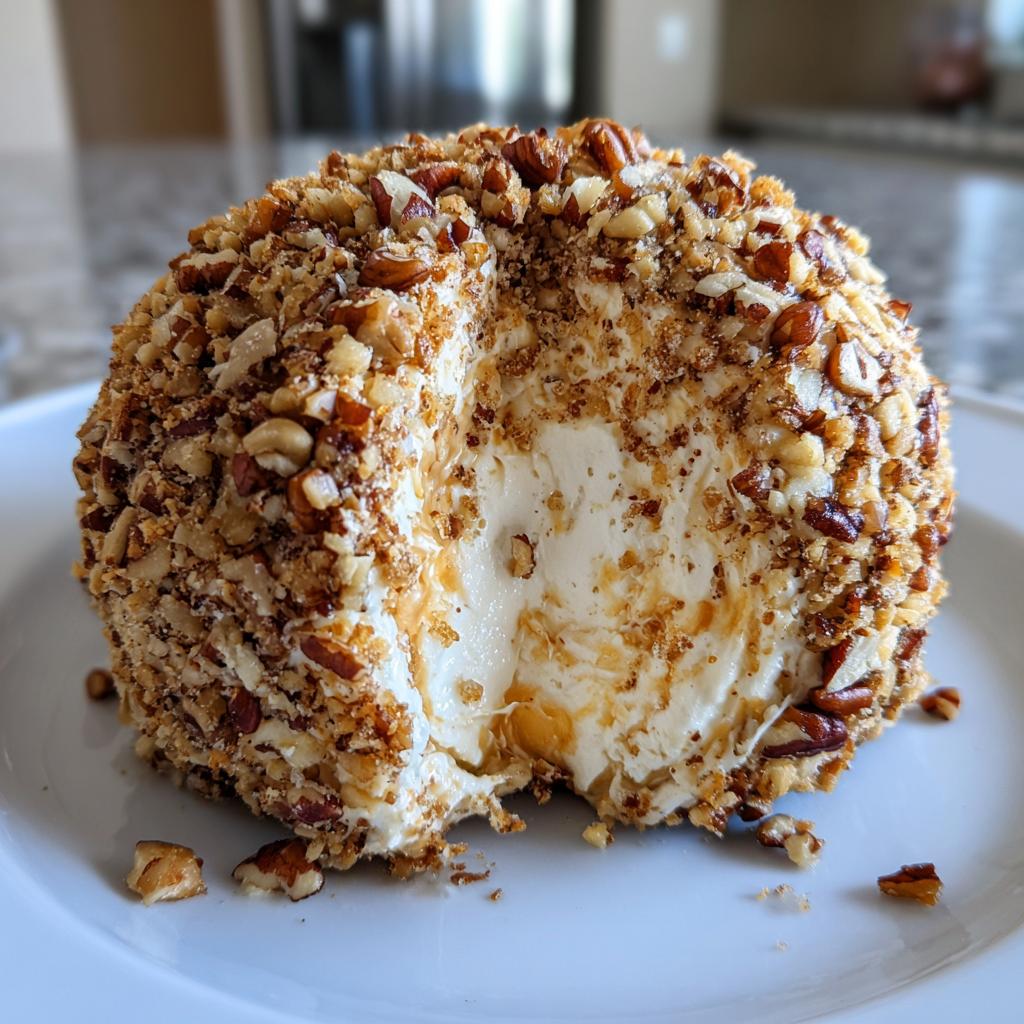
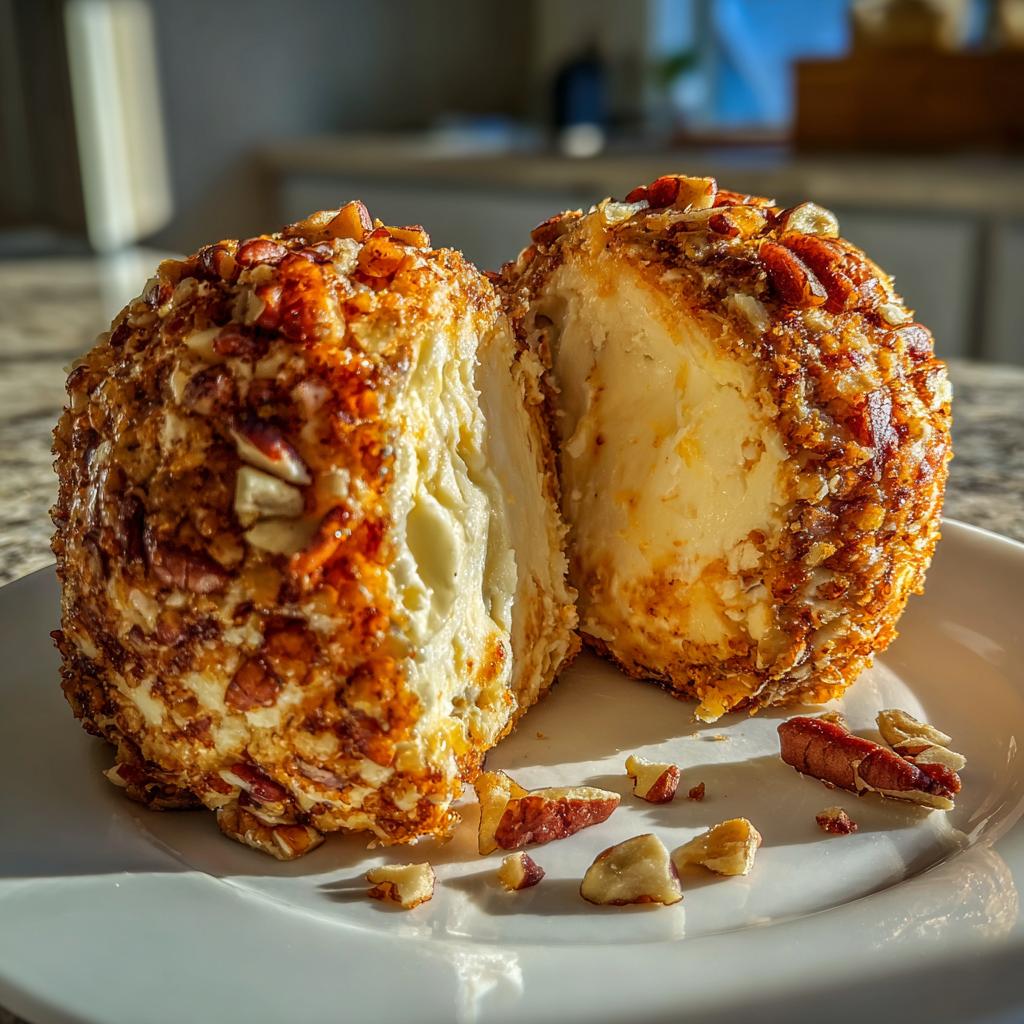
Let me tell you about my secret weapon for last-minute entertaining – this ridiculously easy Cheese Ball with 3 ingredients! I stumbled upon this lifesaver years ago when unexpected guests showed up, and now it’s my go-to for every potluck, game night, and holiday gathering. Seriously, just cream cheese, cheddar, and nuts come together in minutes to create something magical. The beauty? You probably already have everything in your fridge and pantry right now. I’ll never forget my neighbor’s face when I whipped this out during football season – she couldn’t believe something so simple tasted this good. Whether you need a quick snack or a crowd-pleasing appetizer, this cheese ball delivers every single time.
Why You’ll Love This Cheese Ball with 3 Ingredients
Trust me, this isn’t just any cheese ball – it’s the easiest, most reliable party trick you’ll ever make. Here’s why it’s a total game-changer:
- Unbelievable simplicity: Only 3 pantry staples stand between you and cheesy perfection
- Emergency-ready: From fridge to serving platter in just 10 active minutes (plus chilling)
- Crowd magic: I’ve never brought leftovers home – people go crazy for that creamy, nutty combo
- No-stress entertaining: Make it ahead when you’re busy or throw it together last-minute
Seriously, this little ball of joy has saved my hostess reputation more times than I can count!
Ingredients for Cheese Ball with 3 Ingredients
Here’s the beautiful part – you only need three simple ingredients to make magic happen! But don’t let that fool you – I’ve learned through trial and error that quality matters here. Let me walk you through exactly what you’ll need:
- 8 oz cream cheese, softened: Use the full-fat version (trust me on this) and let it sit out for about 30 minutes until it’s spreadable. That brick should dent easily when you press it – cold cream cheese will give you forearm cramps trying to mix it!
- 1 cup shredded cheddar cheese: Sharp cheddar packs the most flavor punch, but mild works too if that’s your preference. Pro tip: shred it yourself instead of using pre-shredded – those bags have anti-caking agents that can make your cheese ball grainier.
- 1/2 cup chopped pecans or walnuts: I’m partial to pecans’ buttery flavor, but walnuts add a nice earthy note. Chop them fairly fine (but not powdery) so they stick well to the cheese ball. Out of nuts? No sweat – try crispy bacon bits, everything bagel seasoning, or even crushed pretzels!
See? Nothing fancy – just good ingredients handled right. Now let’s turn these simple items into something spectacular!
How to Make Cheese Ball with 3 Ingredients
Alright, let’s get our hands cheesy! This is where the magic happens, and I promise it’s so easy you’ll wonder why you ever bought pre-made cheese balls. Just follow these simple steps and you’ll have a perfect appetizer in no time.
Step 1: Combine the Cheeses
First things first – grab that softened cream cheese and dump it into a good-sized mixing bowl. Now here’s my little secret: use a sturdy wooden spoon or silicone spatula to really work that cream cheese until it’s completely smooth. No lumps allowed! Once it’s creamy, gradually mix in your shredded cheddar. Don’t rush this part – you want every shred of cheddar evenly distributed for that perfect cheesy bite. If you’re like me and hate arm workouts, you can use a hand mixer on low, but honestly, the spoon method works just fine.
Step 2: Shape and Coat
Time to get hands-on! Scoop all that cheesy goodness into the center of a sheet of plastic wrap. Here’s a pro tip: wet your hands slightly before shaping – it’ll keep the mixture from sticking to you like glue. Gently form it into a ball shape (don’t stress about perfection, rustic is charming!). Now unwrap your creation and roll it in those chopped nuts, pressing gently so they stick. I like to do this on a plate – the sides that don’t get coated at first can be fixed by giving the ball a gentle roll with your hands. If some spots are being stubborn, just press the nuts in with your fingers. Easy peasy!
Step 3: Chill Before Serving
Now comes the hardest part – waiting! Wrap your beautiful cheese ball in fresh plastic wrap and pop it in the fridge for at least an hour. I know, I know – you want to dig in right now, but trust me, this chill time makes all the difference. It lets the flavors mingle and the texture firm up perfectly. When my niece tried to serve it immediately once, it was a delicious but messy situation! For best results, I usually make mine the night before – the flavors develop even more, and it’s one less thing to worry about when guests arrive.
Tips for the Best Cheese Ball with 3 Ingredients
After making this cheese ball more times than I can count, I’ve picked up some tricks that take it from good to “can I get this recipe?!” amazing. Here are my can’t-live-without tips:
Perfectly softened cream cheese is non-negotiable – I learned this the hard way when I tried to rush the process once. If your cream cheese is still cool to the touch, it’ll be lumpy no matter how much elbow grease you use. Let it sit out for a good 30-45 minutes until it dents easily when pressed. Microwave cheating? 10 seconds only if you must – anything more and you’ll have a melty mess!
Toast those nuts for next-level flavor – This one simple step makes such a difference! Just spread your chopped pecans or walnuts on a baking sheet and toast at 350°F for 5-7 minutes until fragrant. Let them cool completely before rolling – warm nuts will make your cheese ball sweat (not a good look). The toasting brings out this incredible depth of flavor that makes people ask “what’s your secret?”
Parchment paper is your shaping BFF – If you’re like me and hate the sticky-hand situation, try this: place your cheese mixture on parchment, gather the edges, and twist to form a tight ball shape. No mess, no fuss! The parchment also makes it easier to transfer to your serving plate later. Bonus – you can use the same parchment to help press nuts onto any bare spots.
Double the recipe for crowds – Because you’ll need it! I always make two when hosting – one for now, one for later (or for sneaky fridge snacks). The mixture keeps beautifully in the fridge for a couple days before shaping too. Just bring it back to slightly soft before forming your ball so it’s easier to work with.
Variations for Your Cheese Ball with 3 Ingredients
Here’s the fun part – this cheese ball is like a blank canvas waiting for your personal touch! Over the years, I’ve played with so many variations that keep the 3-ingredient spirit alive while changing up the flavors. My friends now expect me to surprise them with something new each time!
Herb Lover’s Dream: Swap out the nuts for a mix of fresh chopped herbs – parsley, chives, and dill are my go-to combo. The green flecks make it look so fancy, and the fresh herbal notes cut through the richness beautifully. Just pat the herbs dry first so they stick properly.
Everything Bagel Magic: Who needs nuts when you’ve got everything bagel seasoning? That garlic-onion-sesame goodness takes this cheese ball to brunch-worthy status. I like to mix some into the cheese too for extra flavor bursts. Serve with bagel chips for full effect!
Spicy Southwest Kick: For my heat-loving friends, I replace the nuts with a mix of chili powder, cumin, and a pinch of cayenne. Sometimes I’ll even stir in some diced jalapeños to the cheese mixture. The cooling cream cheese with that spicy crust is dangerously addictive.
Bacon Bliss: Because everything’s better with bacon, right? Cook up some crispy bacon, crumble it fine, and use that instead of nuts. Pro tip: save a little bacon grease to mix into the cheese for extra smoky flavor. This version disappears fastest at my house!
The beauty of this recipe is how adaptable it is – once you’ve mastered the basic technique, the flavor possibilities are endless. Just remember to keep your coatings roughly the same texture as chopped nuts so they adhere well. Now go play with your food – your taste buds will thank you!
Serving Suggestions for Cheese Ball with 3 Ingredients
Now for my favorite part – showing off your gorgeous cheese ball! After years of serving this at everything from fancy dinners to backyard BBQs, I’ve picked up some foolproof ways to make it the star of any spread. Here’s how I like to present this simple yet impressive appetizer:
The Perfect Pairings: You’ll want something sturdy to scoop up all that cheesy goodness. My go-tos are:
- Buttery crackers (Ritz or Club crackers are perfect)
- Crusty baguette slices, lightly toasted
- Thin apple slices for a sweet-salty combo
- Crisp veggie sticks – carrots, celery, and bell peppers add nice color
- Pretzel rods for that satisfying salty crunch
I usually arrange a variety around the cheese ball so guests can mix and match flavors.
Presentation Matters: Don’t just plop it on a plate! Try these easy tricks:
- Use a pretty cheese board or marble slab as your base
- Garnish with fresh herbs or edible flowers around the edges
- Add small bowls of extras like honey, hot pepper jelly, or chutney for dipping
- For holidays, shape the cheese mixture into a pumpkin (orange food coloring) or snowman instead of a ball
The extra 30 seconds of styling makes it look like you spent hours!
Temperature Tip: Take the cheese ball out of the fridge about 15-20 minutes before serving. That slight softening makes it easier to spread while still holding its shape. If it’s a hot day, I’ll keep it on a chilled marble slab to prevent melting.
Last pro tip – always put out a cheese knife or small spreader. Watching guests try to scoop with crackers alone is a recipe for flying cheese disasters (learned that one the hard way at my cousin’s wedding shower!). Now go wow your guests – this simple cheese ball deserves its moment in the spotlight!
Storing and Reheating Cheese Ball with 3 Ingredients
Here’s the best part about this cheese ball – it actually gets better after sitting in the fridge! I always make mine at least a day ahead because that chill time lets all the flavors really come together. Just wrap it tightly in plastic wrap or pop it in an airtight container, and it’ll stay fresh and delicious for up to 5 days. No reheating needed – in fact, I don’t recommend it since that could make the cheese too soft.
Want to get really ahead of the game? This cheese ball freezes beautifully! Here’s my foolproof method:
- Wrap the uncoated cheese ball tightly in plastic wrap, then again in foil
- Freeze for up to 1 month (any longer and the texture might suffer)
- When ready to use, thaw overnight in the fridge
- Roll in your nuts or other coating right before serving
I always keep one in my freezer for those “oh no, I forgot to bring something!” moments. Just last month, my frozen cheese ball saved me when my book club host had a last-minute cancellation – I showed up with this thawed beauty and looked like a hero!
One important note: if you’ve already coated your cheese ball with nuts or other toppings, I don’t recommend freezing it that way. The coating can get soggy when thawed. Instead, freeze the plain cheese mixture and add your crunchy toppings fresh when you’re ready to serve. This keeps everything tasting and looking its best.
Cheese Ball with 3 Ingredients FAQs
After sharing this recipe with countless friends and family members, I’ve gotten the same questions over and over. Here are the answers to everything you might be wondering about this simple yet perfect cheese ball!
Can I use low-fat cream cheese for this recipe?
Technically yes, but honestly? Don’t do it! I tried this once when trying to “healthify” the recipe and regretted it immediately. The texture turns out gummy and the flavor falls flat. The full-fat version gives that luxuriously creamy mouthfeel we all love. If you’re concerned about calories, just enjoy a smaller portion – it’s so rich and satisfying that a little goes a long way!
How far in advance can I make the cheese ball?
This is the ultimate make-ahead appetizer! I regularly make mine 2-3 days before an event, and it actually improves as the flavors meld. Just wrap it tightly in plastic wrap and keep refrigerated. If you’ve already coated it with nuts, wait to add any fresh herb toppings until right before serving so they stay vibrant. The longest I’ve kept one was 5 days, and it was still delicious (though let’s be real – it never lasts that long in my house!).
My cheese ball is too soft to hold its shape – what went wrong?
Oh honey, I’ve been there! Usually this means either your cream cheese was too warm when you mixed it (it should be softened but still cool to the touch), or you didn’t chill it long enough before serving. Pop it back in the fridge for another hour or two – that should firm it right up. If you’re really in a pinch, you can briefly put it in the freezer for about 15 minutes, but watch it closely so it doesn’t freeze solid. Next time, make sure to chill for the full hour minimum – patience is key!
Nutritional Information
Okay, let’s be real – we’re not eating cheese balls for their health benefits! But since I know some of you like to keep track (or need to for dietary reasons), here’s the scoop on what’s in each delicious serving. Remember, these numbers are estimates based on standard ingredients – your exact counts might vary slightly depending on brands and exact measurements.
Per serving (about 1/8 of the cheese ball):
- Calories: 150
- Fat: 13g (6g saturated)
- Carbohydrates: 2g
- Fiber: 1g
- Sugar: 1g
- Protein: 5g
- Sodium: 180mg
Now that you’ve got all the details, what are you waiting for? Whip up this ridiculously easy Cheese Ball with 3 ingredients and make your next gathering unforgettable! And hey – when you try it, drop a comment below telling me what creative twist you added. I’m always looking for new flavor ideas to try!
Print
3-Ingredient Cheese Ball: Irresistible, Effortless Party Magic
- Total Time: 1 hour 10 minutes (includes chilling)
- Yield: 1 cheese ball (about 8 servings) 1x
- Diet: Vegetarian
Description
A simple and delicious cheese ball made with just 3 ingredients. Perfect for parties or snacks.
Ingredients
- 8 oz cream cheese, softened
- 1 cup shredded cheddar cheese
- 1/2 cup chopped pecans or walnuts
Instructions
- In a bowl, mix cream cheese and shredded cheddar until well combined.
- Shape the mixture into a ball using your hands.
- Roll the cheese ball in chopped nuts until fully coated.
- Refrigerate for at least 1 hour before serving.
Notes
- Let the cream cheese soften at room temperature for easier mixing.
- You can substitute the nuts with herbs or spices for a different flavor.
- Prep Time: 10 minutes
- Cook Time: 0 minutes
- Category: Appetizer
- Method: No-Cook
- Cuisine: American
Nutrition
- Serving Size: 1/8 of cheese ball
- Calories: 150
- Sugar: 1g
- Sodium: 180mg
- Fat: 13g
- Saturated Fat: 6g
- Unsaturated Fat: 6g
- Trans Fat: 0g
- Carbohydrates: 2g
- Fiber: 1g
- Protein: 5g
- Cholesterol: 30mg
Keywords: cheese ball, 3-ingredient, appetizer, party food


